In this lesson we will tell you how to draw a child's drawing with a pencil. To draw this baby, you do not need to have special artistic skills. The child we drew looks more like a boy, but if you dream up a little, you can draw a girl in the same way, but adding, for example, eyelashes or a hairstyle characteristic of girls. You can also draw a dress decorated with ruffles and lace instead of a T-shirt. The pictures below show a variant of drawing a baby boy, but if you remove the cap and finish the hair and bows, then you will get a cute little girl. Children drawn with a pencil look very realistic and funny.
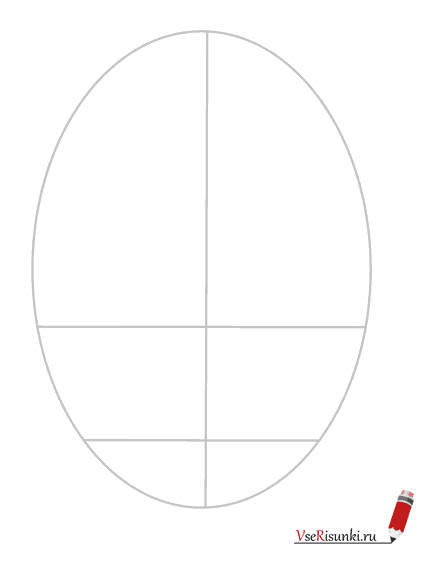
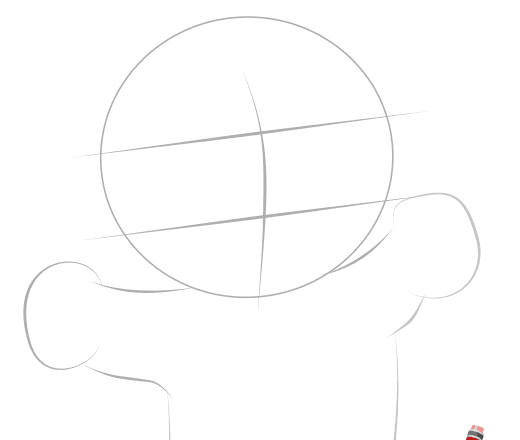
Stage 1. To draw a child with a pencil in stages, you first need to draw the main oval of the face. Through it we draw a line of eyes just below the middle, and under it another line - this will be the child's mouth. And one more line - vertically in the middle of the face. These lines should be very thin, because in the future we will have to remove them completely - these lines are only auxiliary.
 |
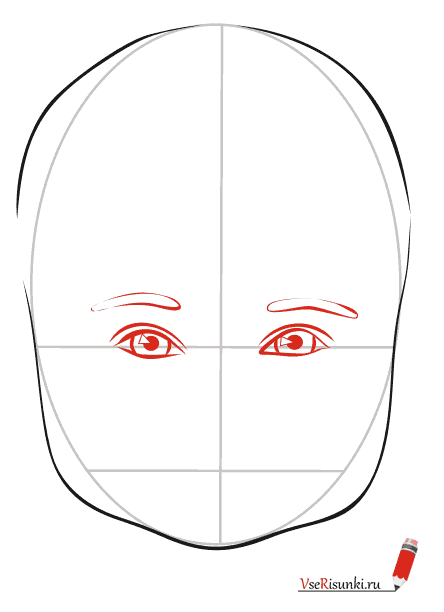
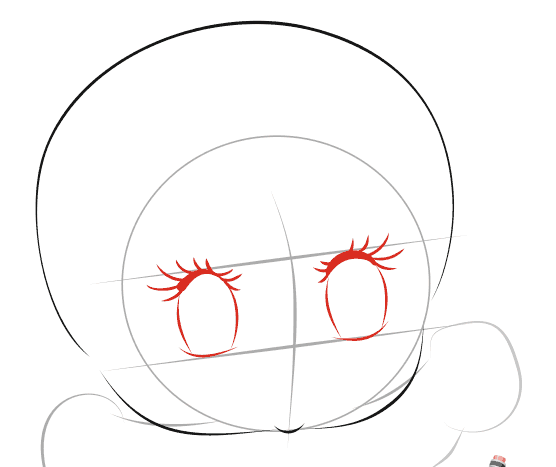
Stage 2. We draw the outline of the child's head. We form the boy's cheeks just below the middle auxiliary line.

Stage 3. Now we draw the eyes of the baby. In our version, the cilia are not visible, but you can add them if, for example, you want to draw a girl with a pencil in stages.
Stage 4. At the next stage, we will draw a mouth for the child and two cute children's folds under the eyes.

Stage 5. Now let's draw our child's ears and nose. Please note that the middle of the ears is just in line with the eyes.
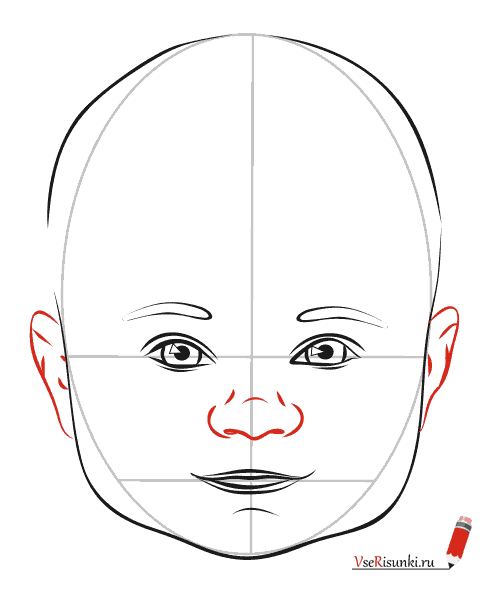
Stage 6. We remove all auxiliary lines - we will no longer need them, since the head is completely ready.

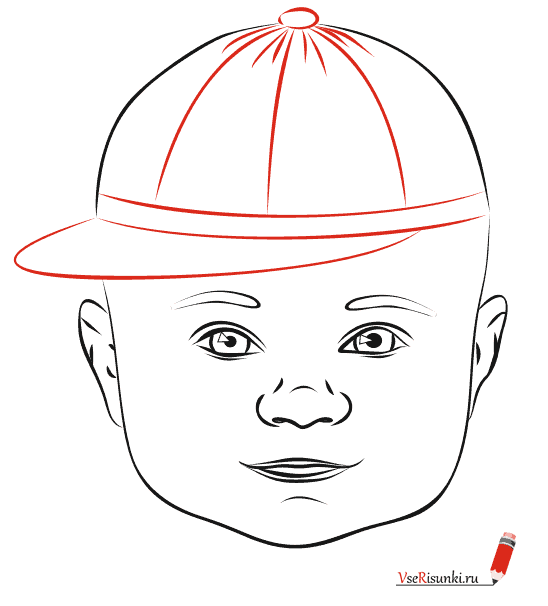
Stage 7. Let's draw a cap and move on to clothes and hands. Well, in fact, with a headdress or hairstyle, you can dream up. Depending on the hairstyle, it can turn out both a boy and a girl.
Stage 8. We draw a T-shirt, which can either be replaced with any top or dress, or not drawn at all.
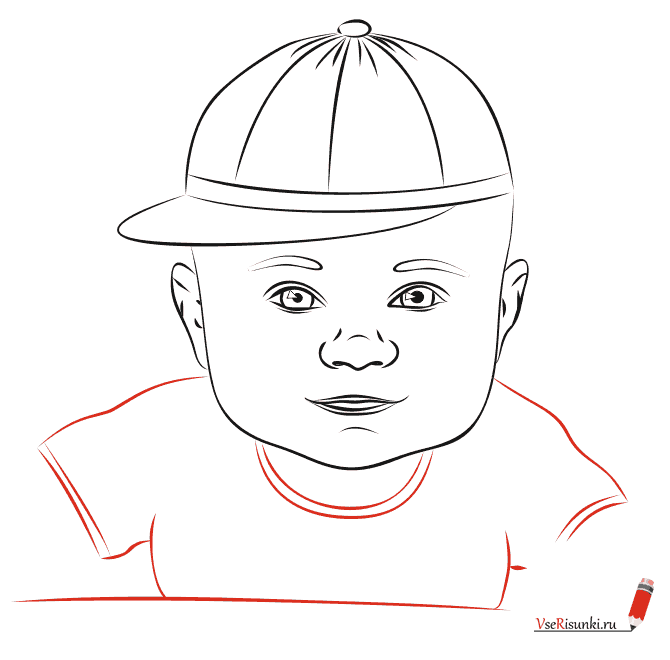
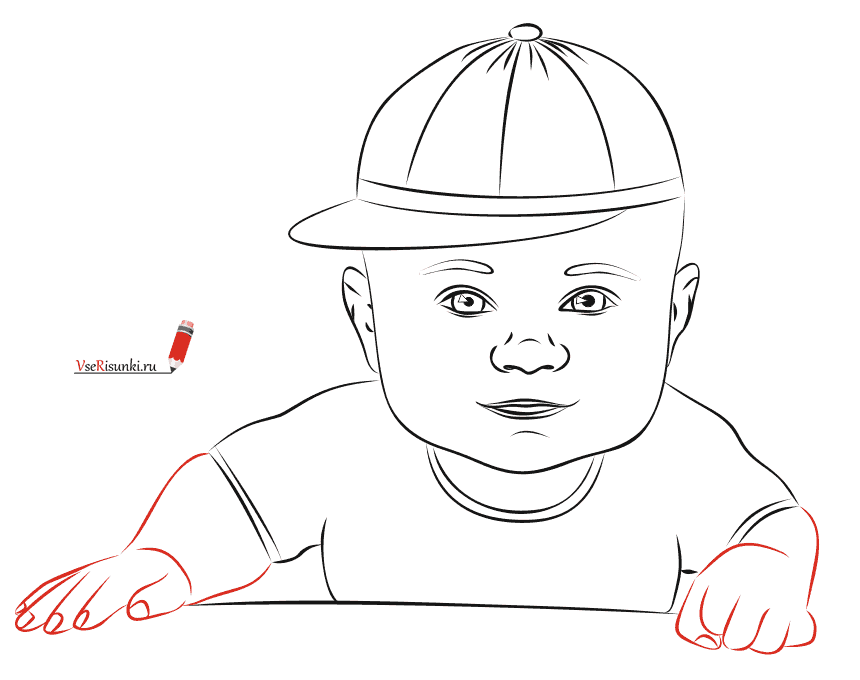
Stage 9. We draw hands clenched into fists. Children at a young age quite often clench their fingers into fists, so the baby's hands look realistic.
Stage 10 Now let's move on to coloring our child. You can decorate it the way you want. We decorated it like this:
 |
Here we have such a cute little one. The drawing is quite simple in execution, even a child can handle it. Draw according to our tips, including your imagination. Leave your photos of the drawing in the comments.
The article provides step-by-step descriptions of the drawing of a newborn.
From this article you will learn how to draw a newborn baby correctly and simply. You will discover the basic principles and relationships with which you can create images of wonderful babies.
How to draw a newborn baby with a pencil in stages for beginners and children?
At first glance, it may seem that drawing a child is simple. However, practice shows that you need to start drawing newborns with abstract children's portraits and figures, having previously studied the proportions and memorizing the simple diagrams given in the step-by-step lessons.
Let's try to draw a baby, although this task is not easy: the kids are constantly on the move and only experienced artists manage to draw them from life. Babies are a popular topic in fine arts. This is explained by the ability of babies to cause admiration and tenderness in those who are watching them.
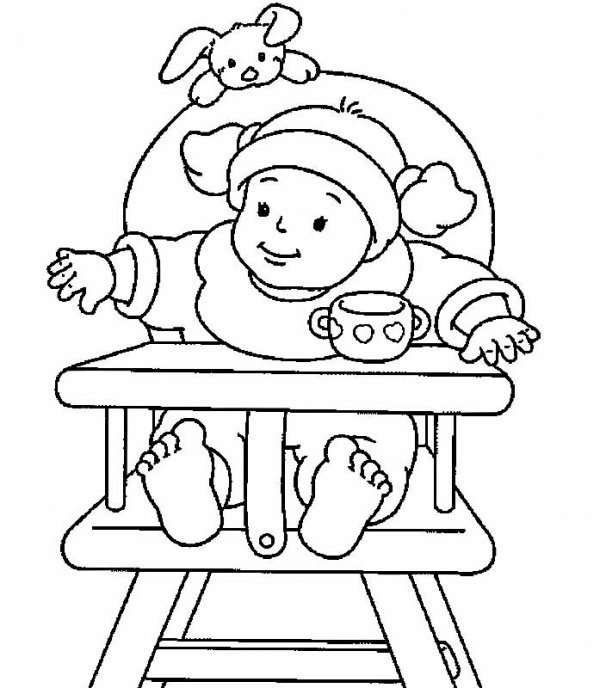
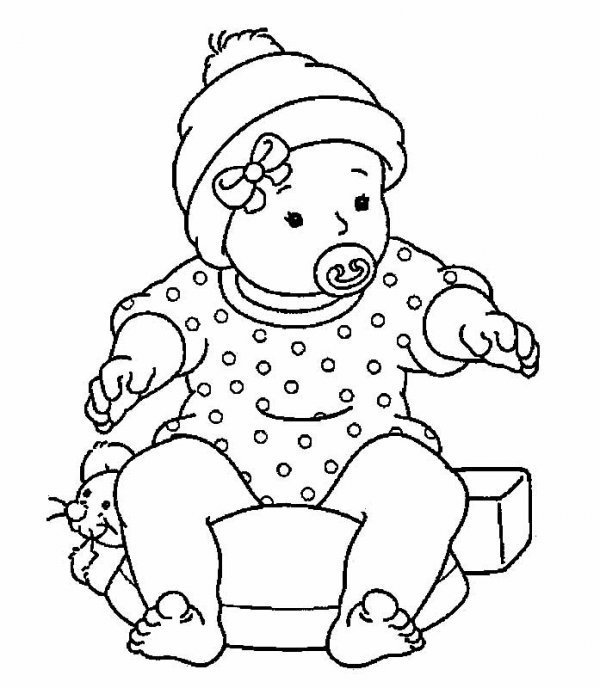
We will draw such a glorious baby:
The finished drawing can be presented to a young mother, who has her own fidget and prankster.
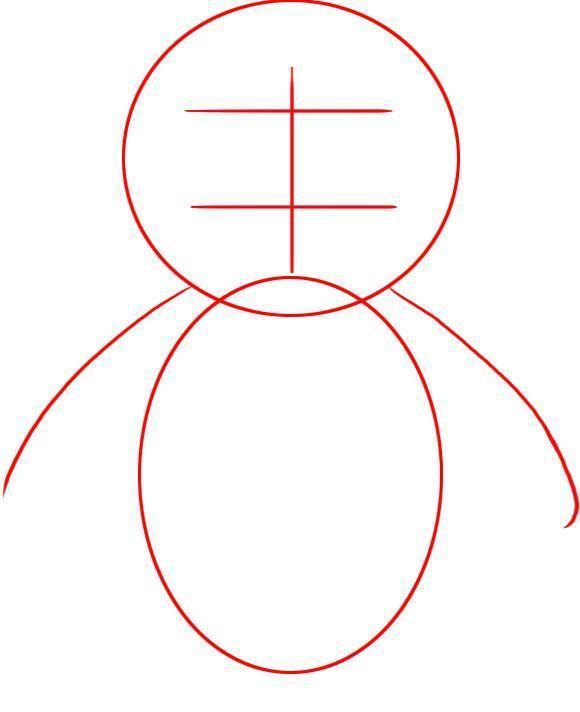
- We put the initial lines on the sheet: a circle, which will later become the baby's head, stepping back a little from the circle, we draw two arcuate lines - the shoulders, we outline the body and arms with lines. Inside the circle we draw two parallel lines, which are crossed in the center by the third line.
 We draw the initial contours
 - Stepping back from the circle upwards, we refine the contour of the head: the upper part will be wide and rounded, the lower part will narrow in the cheek area. Let's mark the child's chin with a small dash from below.
 Refine the contour of the head
 - We drew parallel lines inside the circle for a reason: they are necessary for the symmetrical arrangement of the eyes, nose, lips. Let's draw on both sides of the center line the big oval eyes of the baby. Arcuate strokes denote the lower eyelids. Let's draw long curved eyelashes on the upper eyelids.
 Draw the eyes of a baby
 - We draw the pupils, leaving white round highlights in them.

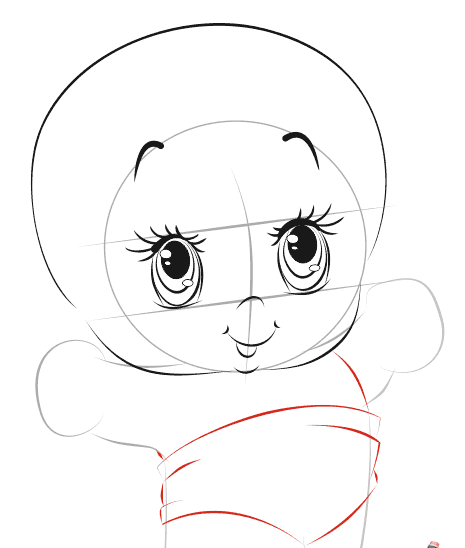
- Draw two curved lines on the circle line. These will be the eyebrows of the baby raised in surprise. We draw a tiny nose on the bottom vertical line. Draw a mischievous smile.
 Draw eyebrows, nose and mouth
 - From the lower contour of the cheek, we draw a curved line down, denoting the contours of the tummy and panties, which puff up at the top.
 Draw the line of the tummy
 - We draw short hands of the baby with spread fingers. The main thing is that they look plump, like newborn babies.
- We refine the contours of the baby's legs, adding to him the fingers on each foot and the heel on the left leg.
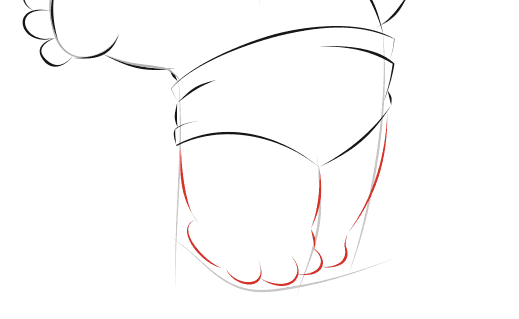 Refine the contours of the legs
 - We draw on the top of the head a few funny protruding hairs and add ears. They are almost invisible behind the widely spaced arms, but we need to outline their contours and inner lines.
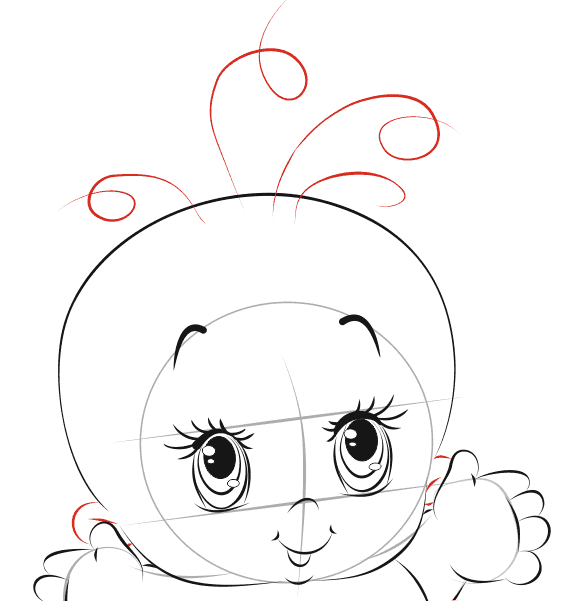 Draw sticking hairs
 - We decorate our miracle with pink color. Let's make the baby's eyes sky blue, and the panties blue.
 It remains to decorate the baby
 Here's how to draw a newborn in motion:


Another easy way to draw a baby:
- Let's depict a round head and an oval body intersecting with each other. Let's show two curved lines of the hand. Let's draw a central vertical line inside the circle, add two more horizontal ones.
- Now you can dream up and, if experience allows, draw such a funny baby.

It will take a little longer to draw this laughing child:

As you noticed, it is easy to portray a little one if it is a cartoon character. In this case, minor inaccuracies made when drawing will not spoil the picture.
- draw the head, add the body in the form of a trapezoid and two ovals for the legs
- detail the drawing: add eyes, small ears, nose and pacifier
- draw pens, hairs on the head

According to the following scheme, you can easily draw a baby in full height:

- We draw the same lines as in the picture.
- Using the picture tips below, you will draw a "real" pretty baby. Don't think it's hard. step by step lesson very simple.
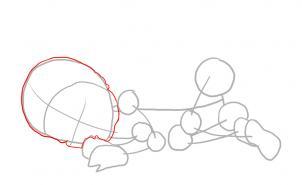
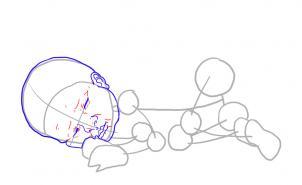
- Let's decide how much space the baby will take on the sheet and mark its approximate outlines with light lines.
- Let's draw the initial contours of the baby. To do this, we will give some sections a geometric shape.

- Now we outline the outline of the head. We draw auxiliary lines inside the circle for the head.
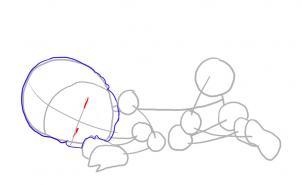
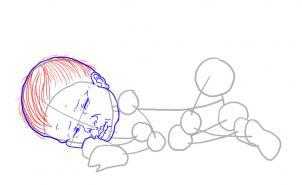
- We draw short strokes on the line of the eyes - the baby is sleeping, so there is no need to draw open eyes.
- We draw the nose and lips of the baby.
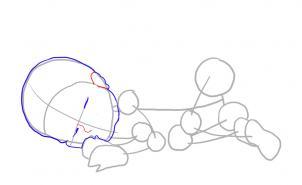
- Let's finish the ear and all the lines inside it.
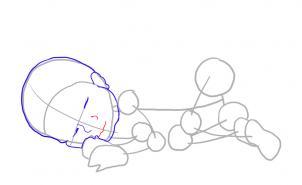 Let's finish the lips
 - Detail and add lines on the face.

- We finish the sparse hairs. We just draw curved lines from the top of the head to the forehead.

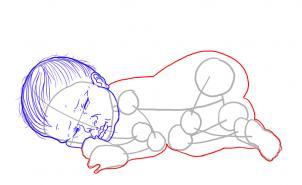
- We draw the lines of the arms and legs.


- We detail the traced areas, add fingers, outline the knees with short strokes.
- We finish the folds on the body of the baby.

- It remains to draw the soft folds of the diaper on which the baby lies.


As you can see, drawing a little Lyalya is not so difficult.
How to draw a face, a portrait of a child with a pencil in stages?
Before drawing a portrait of a baby, you need to remember the rules for building a child's head. To do this, it is not necessary to study a course of human anatomy, but it is enough just to remember one simple formula:
- We start the drawing with the outline of the head. It must be round. We draw two lines inside: horizontal and vertical. On the vertical line we will draw the baby's eyebrows.
- After that, the lower half of the face is divided into 4 equal parts. Under the eyebrow line we will draw the eyes, in the next part we draw the nose, then the upper lip, in the last section we draw the lower lip and chin.
Look at the drawing to understand the principle of constructing a child's portrait. Here each line has its own color:

- the red line divides the circumference of the head horizontally into two parts - the line of the eyebrows
- using the blue line it is easy to draw the eyes, it is also the contour of the lower eyelid
- the green line will help draw the nose correctly
- the orange line is the line of the mouth and chin
The eyes of the newborn are large, wide-set. Eyebrows in babies do not stand out much, so they can be drawn with a few strokes. We draw a snub-nosed nose, plump lips, and outline a small chin with only one dashed line. If the baby is well-fed, then he can draw a few folds under the chin. Still need to add hair, ears.
Draw a portrait of a newborn baby:
- We start the drawing with a circle and intersecting lines inside.
 Draw a circle and intersecting lines inside
 - We refine the contour of the face, showing the hairline and protruding hairs on the temples.
 Refine the contour of the head
 - We draw the upper eyelids, nose and mouth, focusing on the lines drawn earlier.
 Draw eyelids, nose, lips
 - We draw the eyes in more detail, add eyebrows, plump lips.
 We detail the drawn earlier
 - Now you can proceed to the scalp: draw sparse hairs on the top of the head and with short dashed lines show the hairline on the forehead. Add small ears.
 Draw the baby's hair
 - We draw the shoulders of the baby, adding the missing strokes in this part of the picture.

- Outline the contours with a dark color and erase the auxiliary lines.
 Outline with black felt-tip pen
 In order for the baby in the picture not to look like an adult, some points must be observed:
- in a newborn, body proportions differ from those of an adult: their head is large, their arms and legs are plump, and their torso is short
- at the beginning it is necessary to depict the largest details, after that you can move on to the rest
Here detailed instructions, which will help you to gradually complete the portrait of a newborn with a pencil. First, let's get acquainted with the drawing of the profile of the child. In the figure, 5 horizontal lines are drawn, thanks to which the portrait of the baby will turn out to be as realistic as possible:
- A line AB is drawn in the upper part of the head, which separates the upper part of the head and the lower one. On this line are the eyebrows of the child.
- The CD line is the line of the lower eyelid and the upper part of the auricle.
- The EF line runs under the nose.
- The GH line runs under the lower lip.
- The IJ line runs under the chin

Let's move on to drawing a portrait. We will need a blank sheet of paper, a well-sharpened simple pencil and a ruler.
- We draw a square, the size of which corresponds to the size of the head of the depicted child. We draw two lines inside the square, dividing it into four equal sections. This division into parts is necessary to create accurate proportions while drawing the child's face and head.
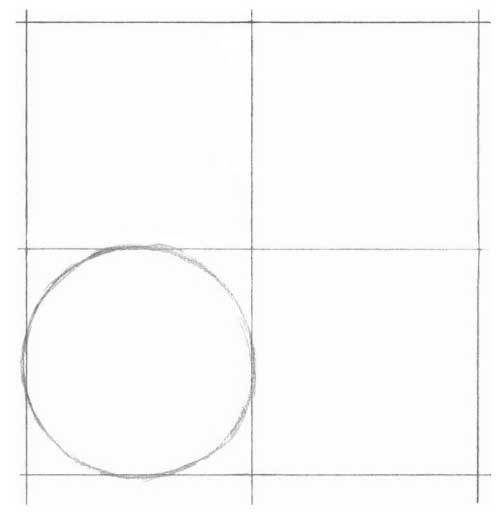
- In the lower left section, draw a circle in which we will place the child's face.
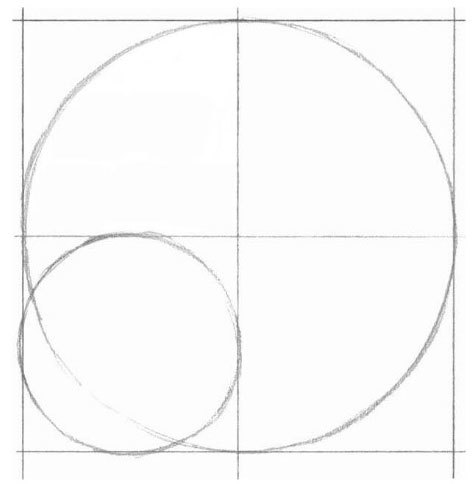
- We enter in the square drawn earlier big circle. This will be the baby's head.
- In a small circle, draw facial features: lips, nose, eyebrows.

- We refine the contours of the child's head and outline the ear in the lower right section with a short line.

- We draw eyes, we finish nostrils, a mouth, a cheek. Add lines inside the ear.
- Delete extra pencil lines, squares and circles.
- We draw hair, gradually wiping the contours of the head and neck. We correct small details and adjust the proportions.

- We begin to apply light dashed lines to the baby's face. You shouldn't rush into it. Take breaks.

- After a while, if you go out for a walk, do something else, you will be able to notice inaccuracies and correct errors. tiny spots in the eyes will look especially interesting - the reflection of light from the shiny surface of the eye.

- Add dashed lines on the face, neck.
- Add shadows on the ear. We use simple HB and 2B pencils for this.
 Draw in more detail the ear
 - Draw the scalp simple pencils HB and 2B.

- The portrait of the baby is ready.

Look at the picture to understand how to draw the face of a newborn with a pencil.
How to draw a baby in a diaper?
The schematic drawings below will help you draw a baby in a diaper:


Drawings of a newborn baby for sketching
If you are looking for pictures of babies to draw, then check out the options below.


Hello!
Children make us rejoice and smile, and cheerful and curious kids touch the eyes of even the most serious adults. Children are a very popular topic in the visual arts, because it is so natural to draw something that delights. Today's lesson is devoted to how to draw a child in which we will study the proportions of the body depending on the child's age.
First, let's deal with the features of the construction of the head, because the proportions of a child's face are significantly different from the proportions of an adult.
- The skull in relation to the face occupies significantly most than in adults. Forehead in relation to the face is much greater than that of an adult.
- In adults eyes are on the center horizontal line. In children, eyebrows are placed on this line, and the eyes are still much lower.
- Chin, jaw, cheekbones and bridge of the nose children are not yet fully developed, so they stand out much less than adults.
- Ears in humans, they are always placed in line with the eyes (above) and the base of the nose (below), children are no exception. Since the line of the eyes and nose is slightly shifted down, the ears are also placed a little lower.
For? to quickly and correctly build a baby's head, without going into details, it is enough to know one simple formula:
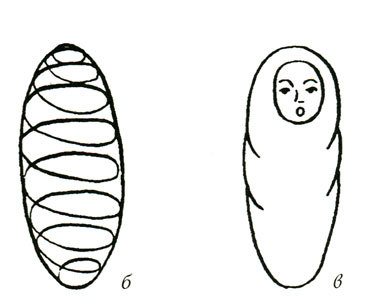
Proportions of the head depending on age
The older the baby, the closer the proportions of his head to the proportions of an adult. Let's analyze everything as the baby grows up, this will help you understand how to draw a child, depending on his age.
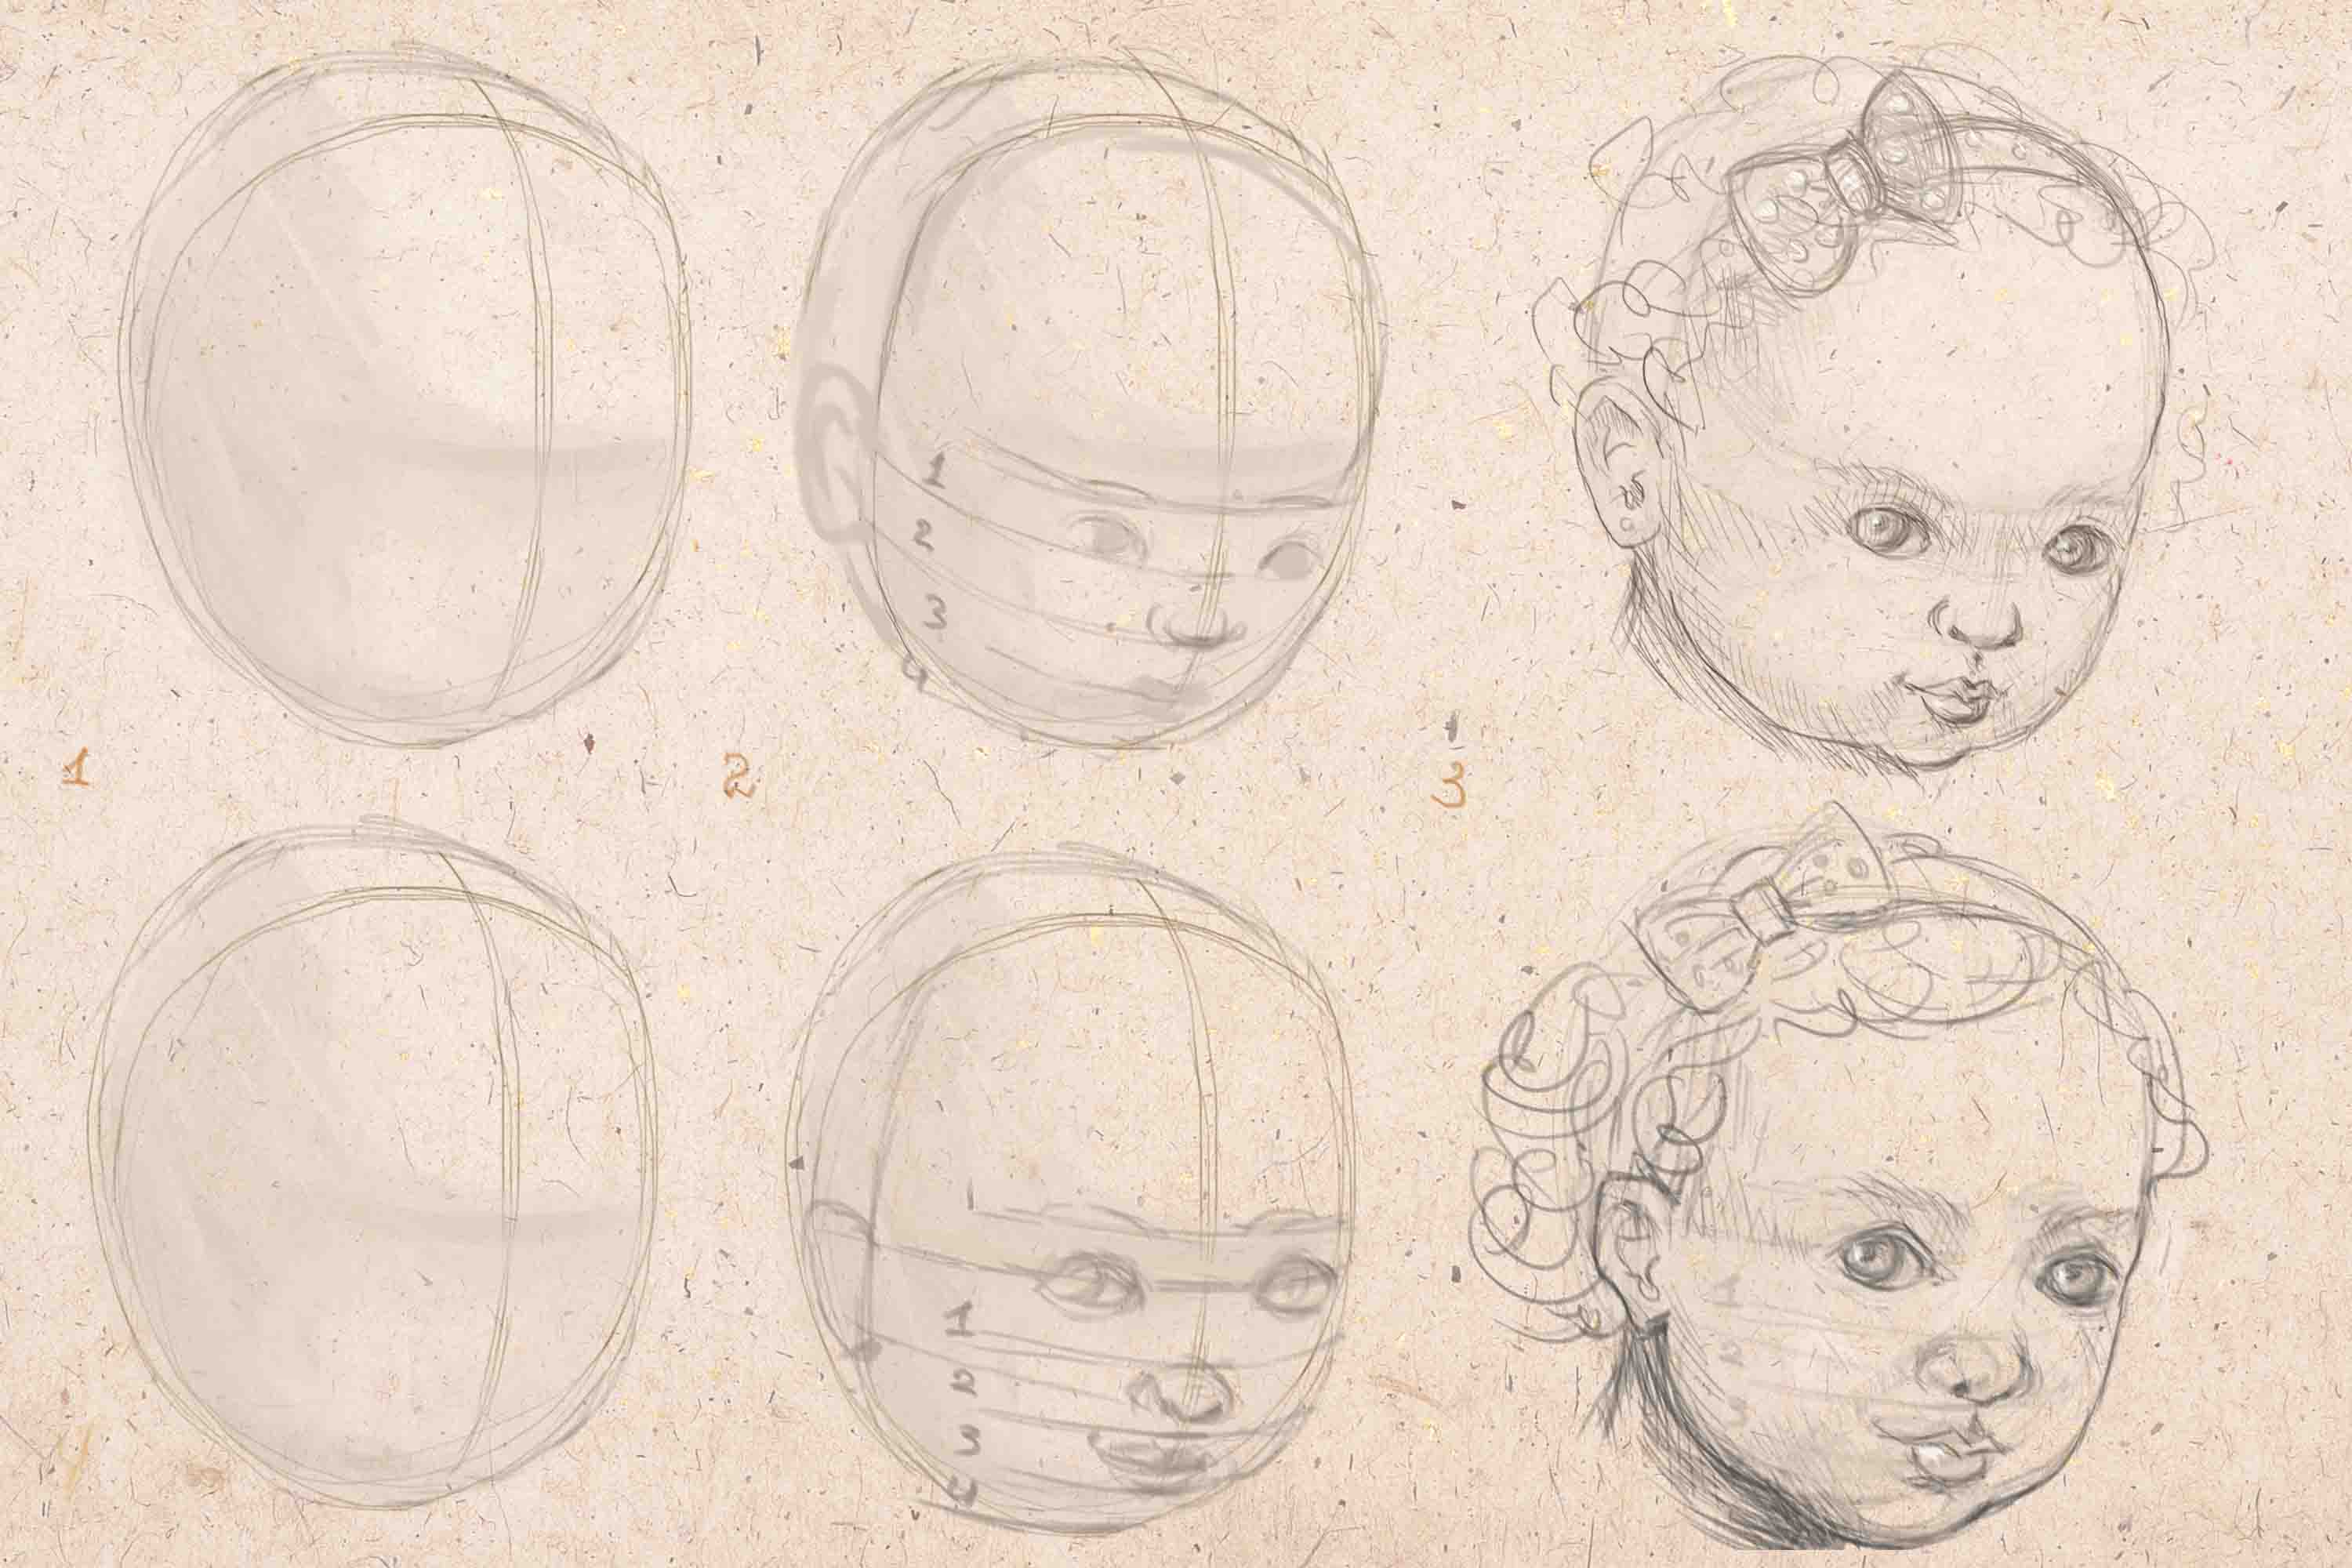 The illustration above shows the sequence of building two children's portraits. The first is just a baby, up to a year old, the second is a girl 3-4 years old. In babies up to a year, the proportions still correspond to the scheme above. In older children, the lines of the eyebrows, eyes, nose and mouth slowly move upward until the eyes reach the center line, as in adults, a more expressive chin also appears.
In younger children school age these lines are displaced by about half, further almost equal to the proportions of adults. 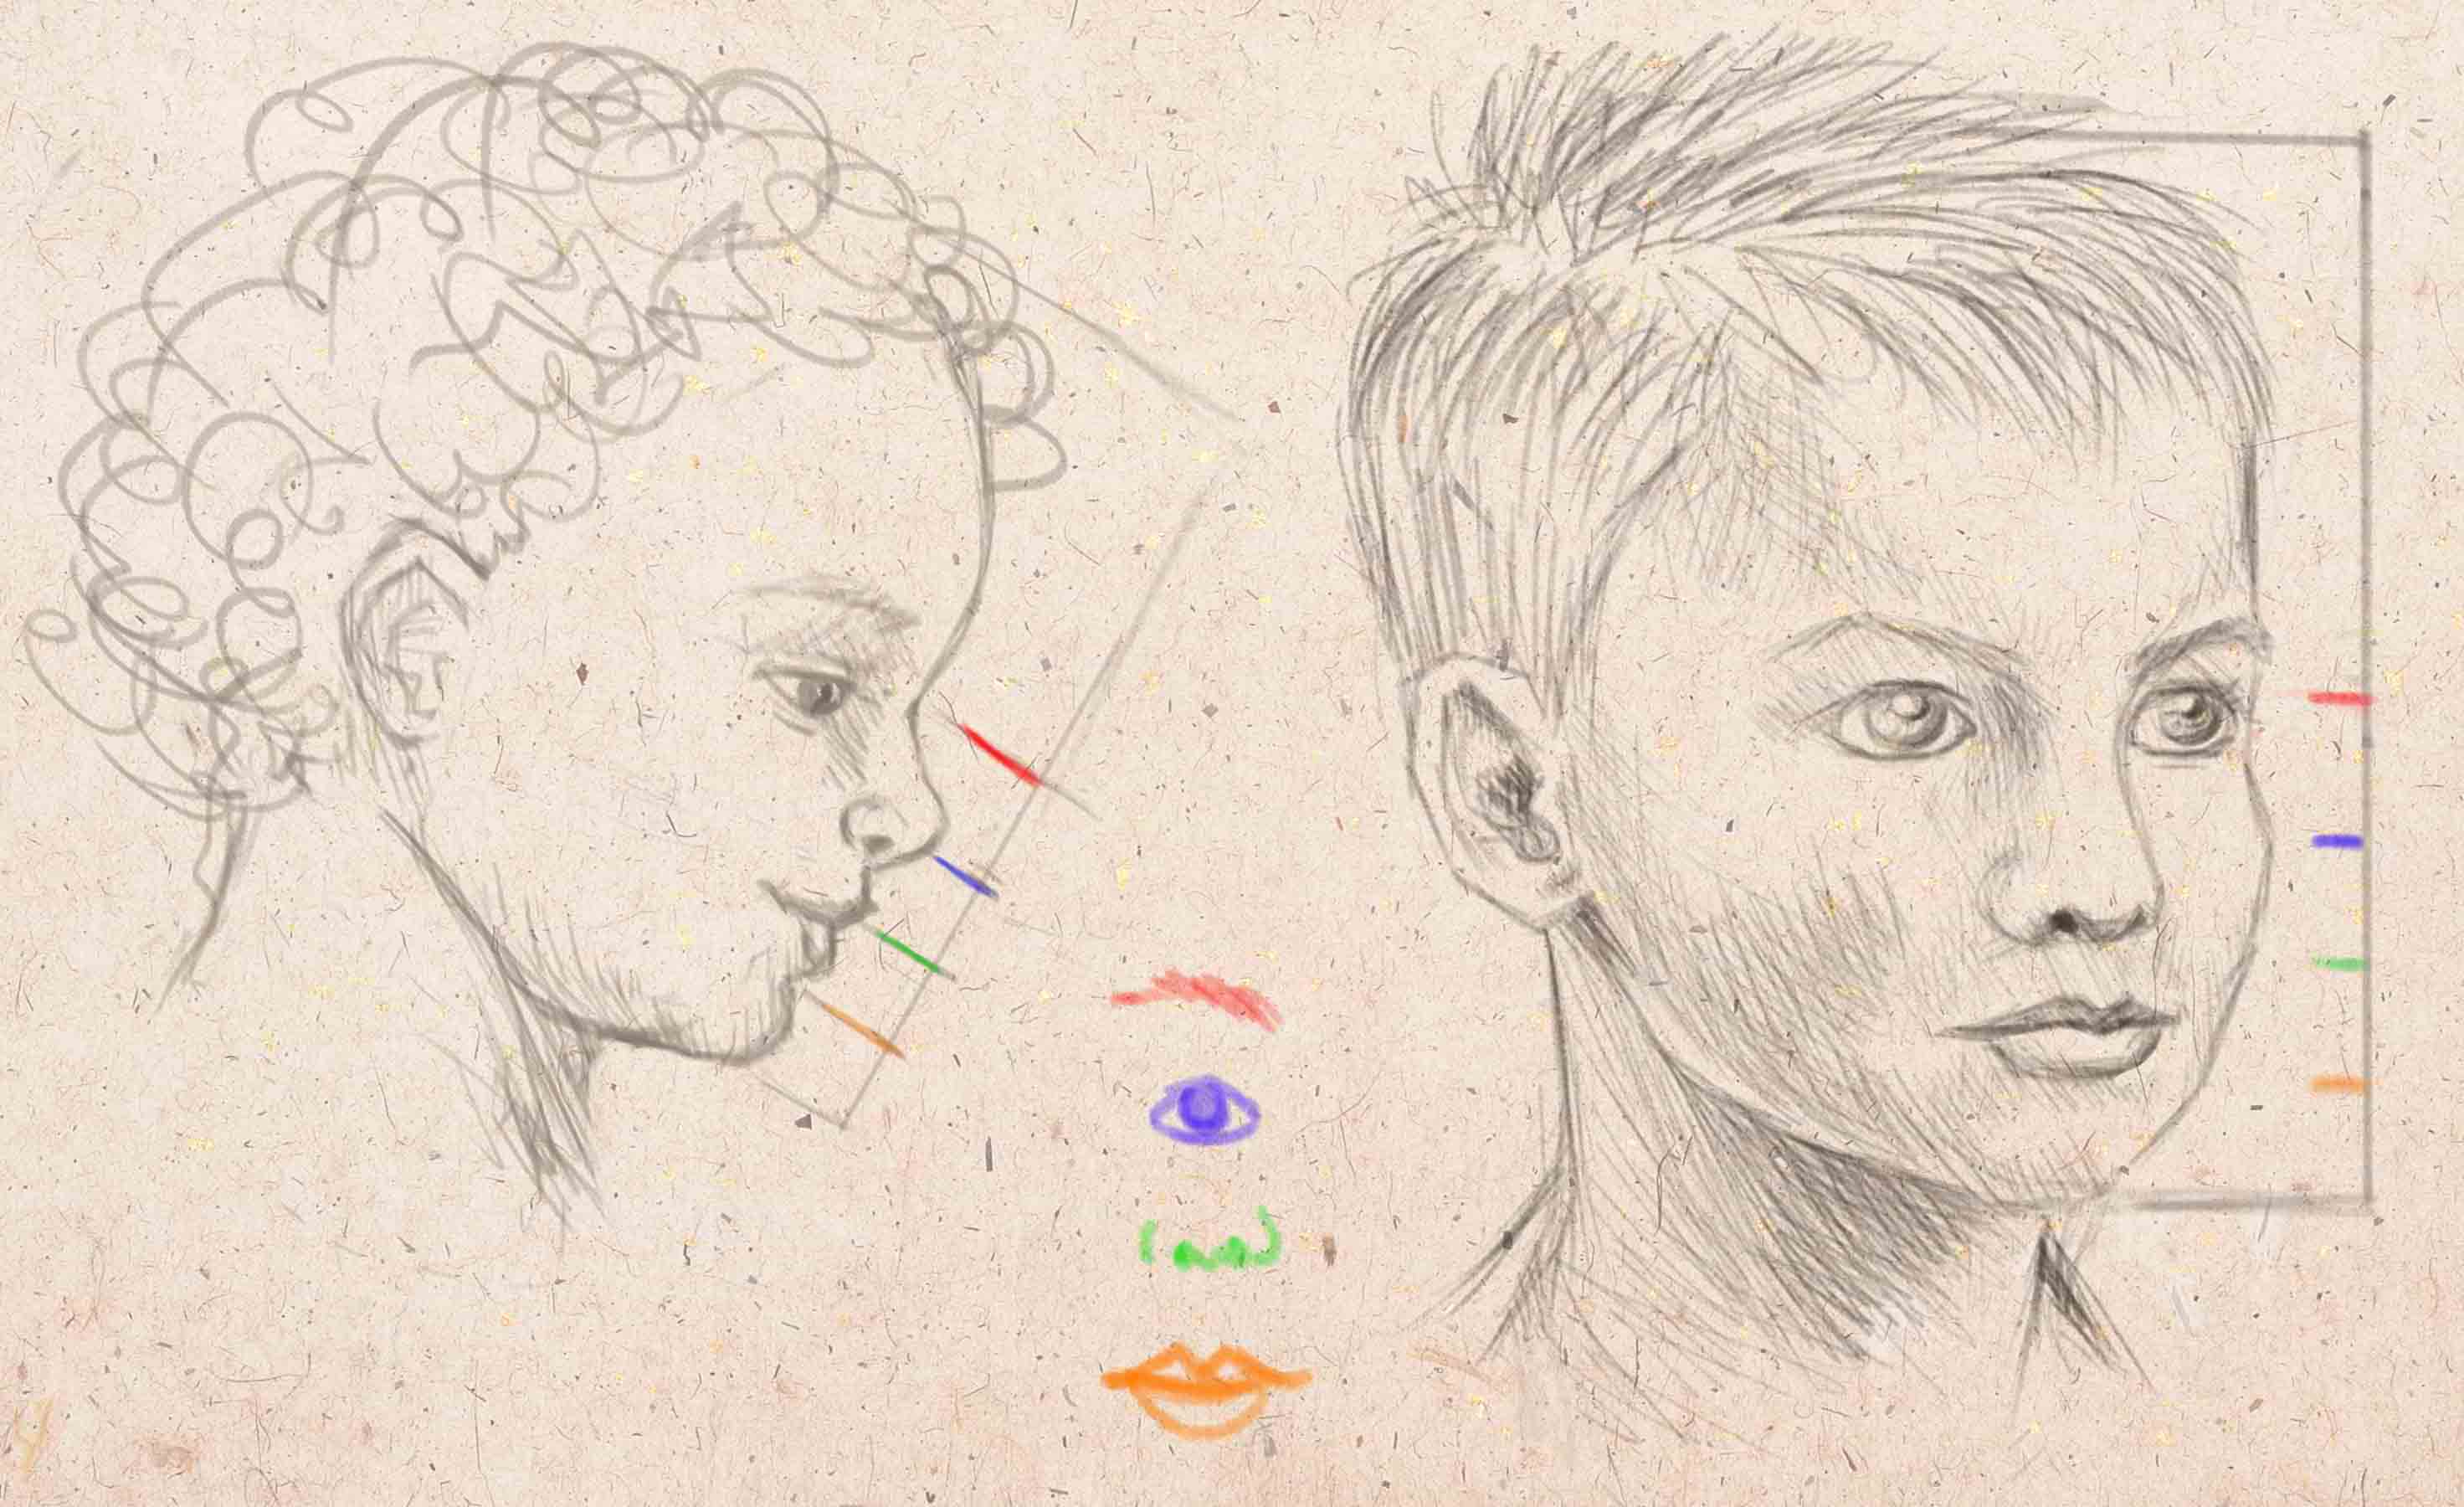 Here is a clear illustration. Here is how to draw children aged 6-10 years old, the proportions of their faces have shifted to the top, and are very close to the proportions of adults. However, we are well aware that these are children. And there are a few little secrets here, which ones, read on.
Features of a child's portrait
A child's face can be very elongated or, conversely, very round, the proportions, depending on the shape of the skull and individual characteristics, can vary greatly.
What makes a child's portrait look like a child's?
- First of all, how big it seems to us Iris in relation to protein. The smaller the baby, the more part of the eye is occupied by the iris.
- The distance from the outer corner of the eye to the ear is greater than in adults (greater than the length of one eye).
- Nose not yet formed, and therefore small and cute.
besides enough simple rules building the head, it is imperative to know and correctly show some anatomical features of children's faces:
- Bridge of the nose in babies it is not yet formed and is slightly distinguished, it is rounded and much more recessed than in adults.
- Cartilage nose also not formed yet. While it is much smaller than it will be when the baby grows up. Have you seen the children long nose? How less baby, the simpler the anatomy of his nose. Almost all children's noses are slightly upturned, snub-nosed. Then, gradually, some structural features are added to these spouts.
- nostrils usually large, draw them at a fairly wide distance from each other. This is important so that your baby really looks like a child, and not an old man.
- cheekbones they do not stand out in babies, because they are not sufficiently developed and well covered with chubby cheeks.
- Sponges plump, in most cases the upper lip seems to hang over the lower one.
- Chin also much smaller than in adults, it is not yet sufficiently developed, therefore it does not protrude forward, but rather is recessed under the lower lip.
- Under the chin line, there are most often fat folds that visually lengthen the head and make the neck inconspicuous.

How the face (eye line) changes depending on the age of the child
Let's reiterate some very important points:
- The smaller the child, the larger his eyes seem. The eyes of children are placed far enough apart, at least there is such a visual effect. If you draw the eyes close, the baby will be unsympathetic. The inner corners of the eyes are in line with the nostrils, and the bridge of the nose almost does not stand out.
- The iris in children is fully formed and will no longer grow, while all other parts of the face are still undergoing development and growth. Therefore, on a small child's face, the eyes seem very large and expressive. From under the eyelids, we see most of the iris and very little of the white part of the eyeball.
- In an adult, the distance between the eyes and ears is equal to the length of one eye, in children this distance is greater. As the child grows, this distance decreases.
In full growth
We draw a child in full growth according to the same principles as an adult. We start from a primitive skeleton, build up muscles, add details.
There are two important points in building a child's figure:
- the smaller the child, the shorter his legs in relation to his entire height
- and the larger the head in relation to the whole figure
In newborn babies, the head occupies 1/4 of the height of his body, and the length of the legs is slightly more than a quarter of the baby's height.
As the baby grows, its proportions change. Basically, the legs and torso grow, while the size of the head changes very slightly. Below is a diagram that will help you find the correct proportions of the child's figure, according to his age.
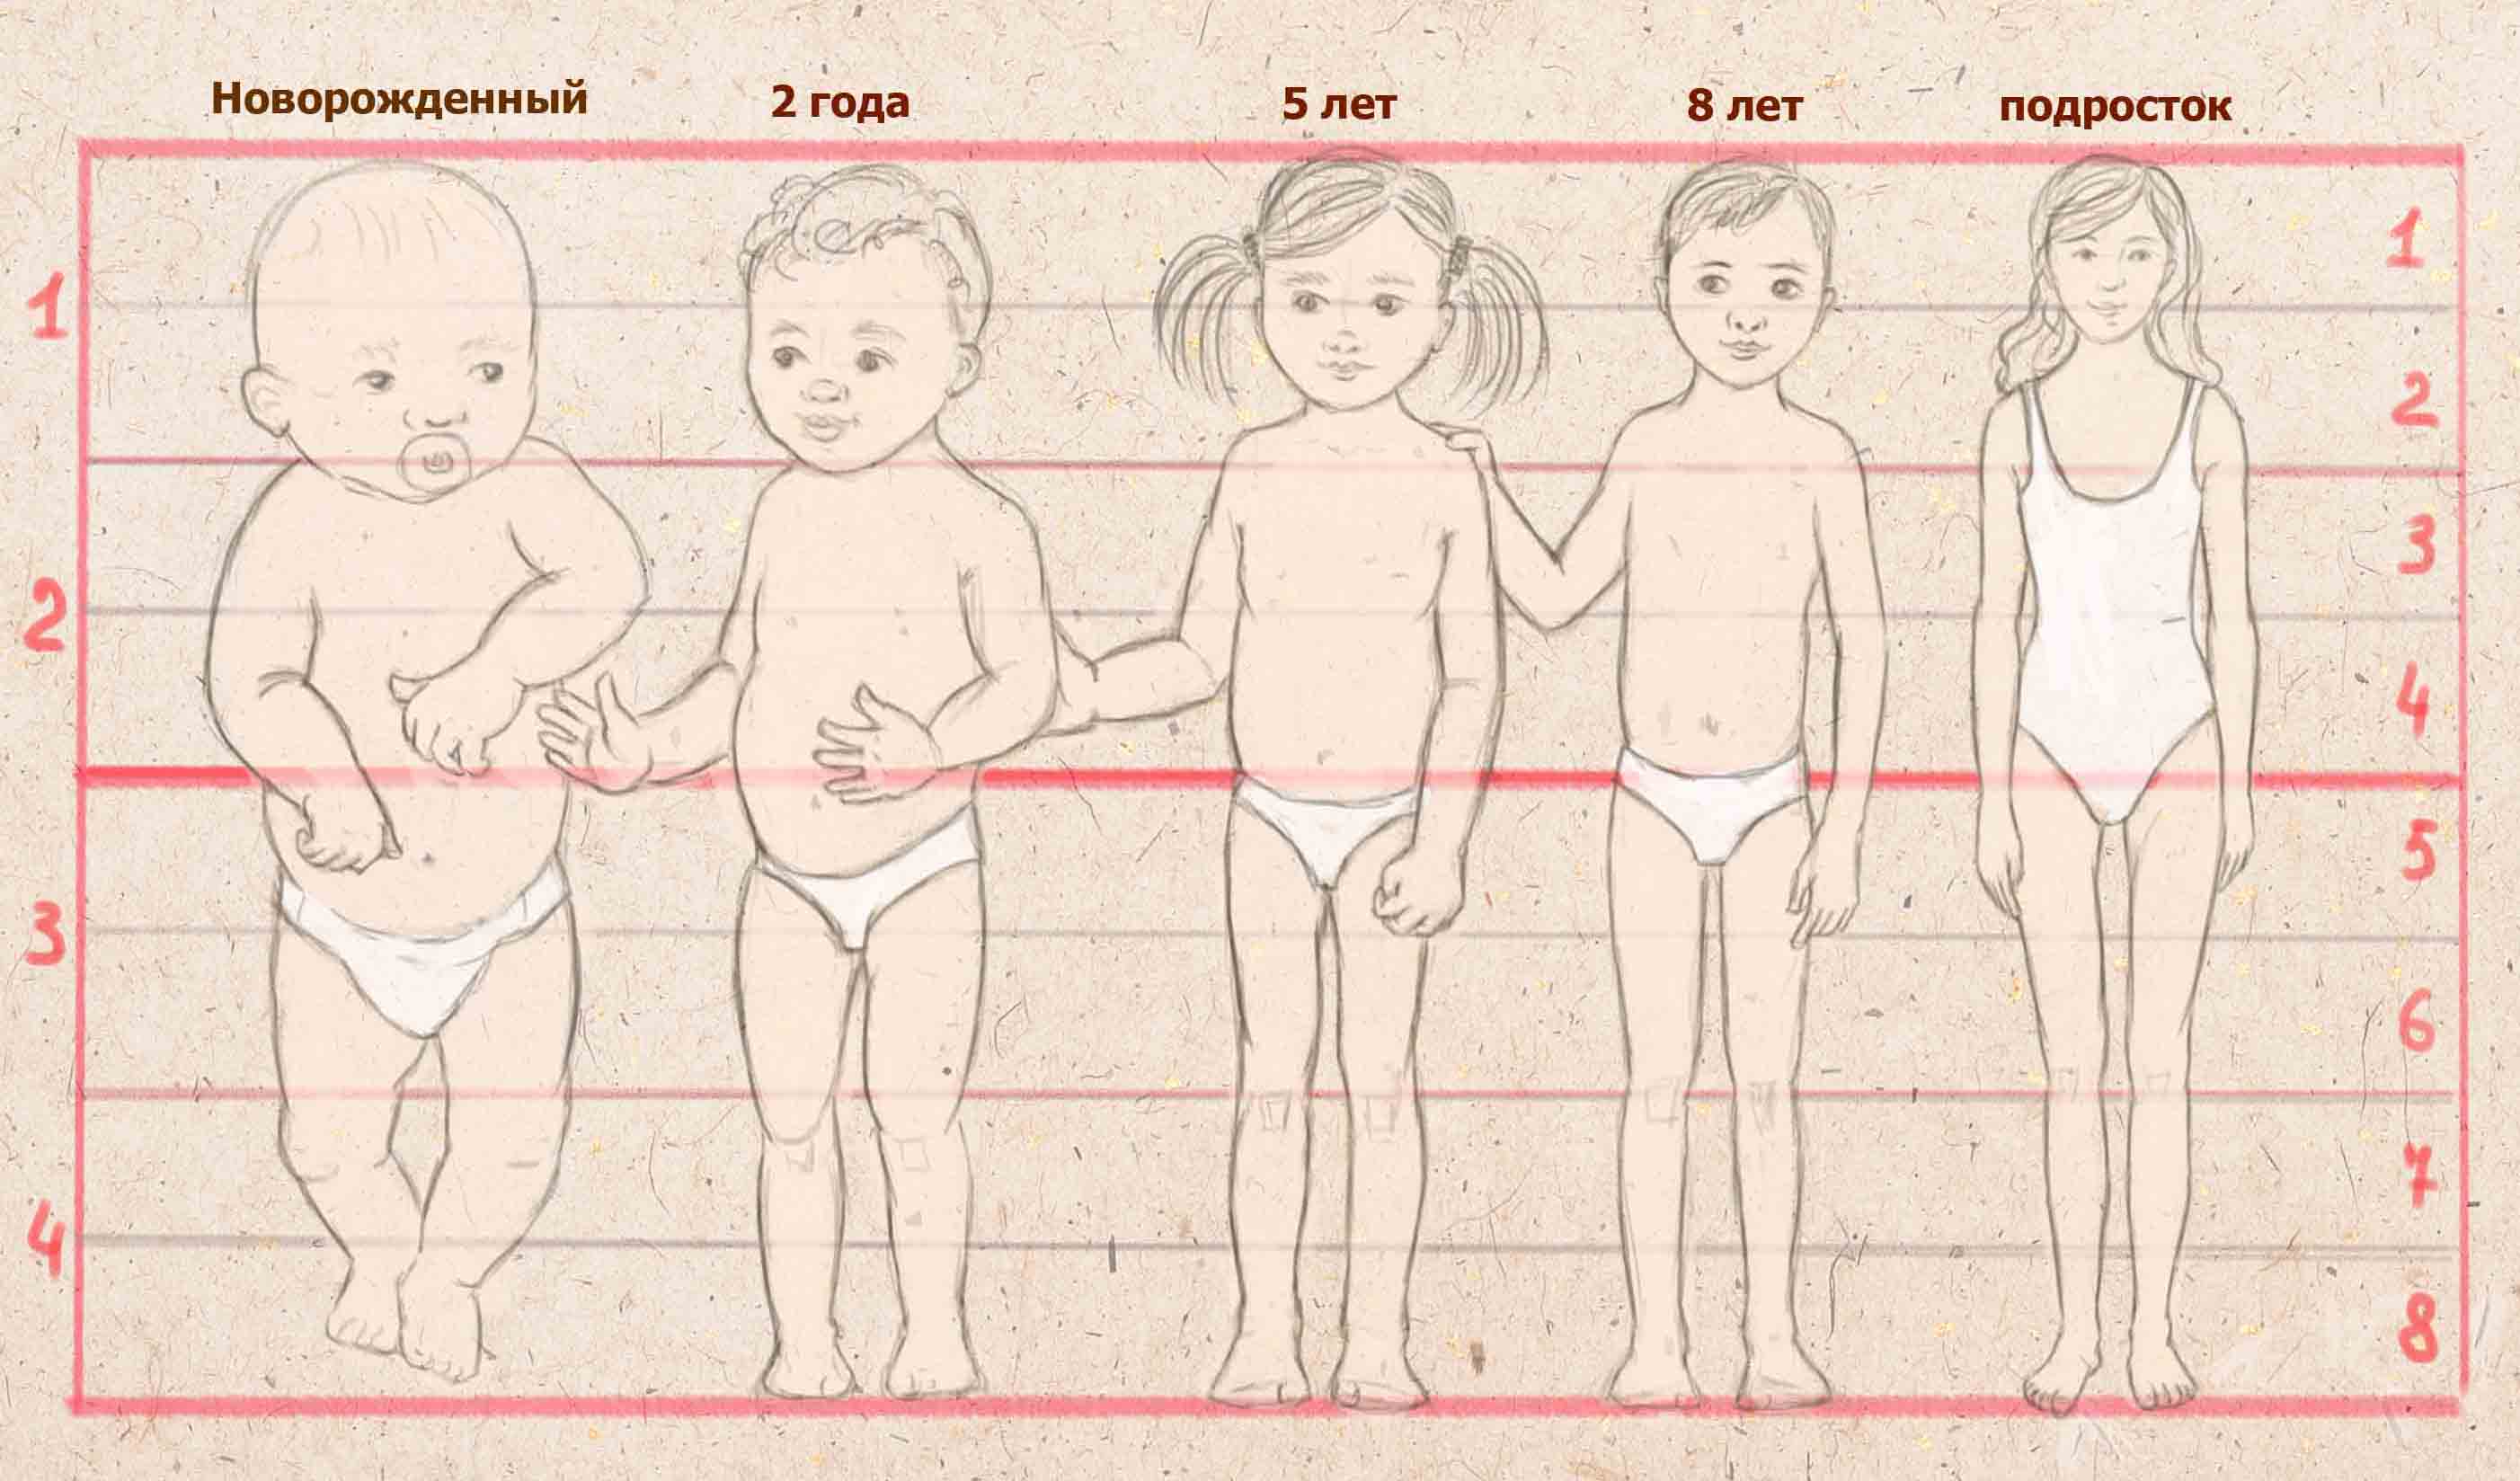
How to draw a child aged two years: you need to designate his height and divide it into four equal parts. The head will take up a little less than a quarter. The navel will be slightly below the middle. The height of the legs is less than half the height.
The smaller the child, the less muscles stand out from him. Babies up to a year old are chubby, there are many folds on their arms and legs, their palms and feet are rounded. In newborns, the neck does not stand out much, since there are several folds under the chin.
Landmarks and ratios
- Elbows in people of any age are placed at the level of the end of the ribs. Keep this in mind when drawing a child.
- We begin to draw the hands at the level of the pubic bone.
- The length of the leg from the hip to the knee is always slightly longer than the distance from the knee to the foot.
- The length of the forearm is slightly less than the length of the humerus.
Video tutorial
Watch a detailed video on how to draw a child in stages with a pencil, depending on his age:
Advice
Drawing children is not as easy as it might seem at first glance, they are constantly on the move, they pose poorly, although it is very interesting to watch them. To learn how to draw kids, it is better to start by simply memorizing the patterns and proportions that are given in this lesson. Draw at least a few abstract children's portraits and figures so that the principles and relationships are deposited in your memory. Then you can start drawing from nature, but for a start it is better to use photographs as nature.
I hope this material was interesting and useful for you, and over time you will create wonderful drawings with children.
Drawing people is a good activity for all artists. Sketches, as well as detailed drawing, allow you to study anatomy in practice. In this article you can find helpful tips because,
Drawing composition
The first step is to think about the composition of your drawing. Composition is the correct arrangement of objects in a picture so that it looks interesting. Illiterate compositional work will not be able to hold the viewer's attention for too long.
Determine what should be the main thing in the work. If a child, then the rest of the objects around should be parts of the environment that create an atmosphere or support the figure (table, chair, stone, etc.).
An ideal composition is when a drawing can be viewed endlessly, wandering through various details without missing the main point.
Learning to draw children: anatomy
It is worth remembering that children's anatomy is significantly different from an adult. Proportions, that is, ratios very often do not coincide with the body of an adult. This is especially pronounced in adolescent children. Be prepared to portray a short person with a slightly larger head.
Unlike an adult figure, in a child's figure, the head will occupy approximately 1/4 or 1/5 of the entire body.
The easiest way to quickly and correctly learn how to draw children is to mentally break the child's body into its component parts. It is customary to designate arms and legs as bowling pins, and at the joints (knees, elbows, transition to the foot) balls of different sizes are drawn. This structure allows you to then connect all the figures, creating the muscle mass of a person. Make sure that the segments of the arms to the elbow and after are the same length. The same rule applies to the legs. 
Face
Be sure to build a face. Construction is drawing lines on which we will draw eyes, nostrils, lips. You can put serifs that will limit the size. It is recommended that you make such serifs for the nose, eyes and lips before drawing them. This makes it possible to check the proportions before making many mistakes.
If the face is in full face, both halves of it will be symmetrical. If the head is turned, observe the perspective. This means that one half of the face will be smaller and shifted up (if you are looking from below) or down (if you are painting from above). The difference in size should be barely noticeable. Correct perspective is one of the most difficult tasks if you want to learn how to draw children.
It is very important to work out the details. Emotions are one of them. In children, as a rule, feelings are manifested outwardly brighter than in adults. Therefore, when answering the question of how to draw children, it is very easy to portray sincere joy or sadness by raising the corners of the lips or arching the eyebrows of the child.
clothing
When depicting a child’s clothes, it is recommended to focus on something discreet or light. These can be inconspicuous things that do not distract from emotions. However, you can work out another artistic solution - themed clothes and decorations. For example, images of a pirate, a wizard, a warrior look very good in drawings. 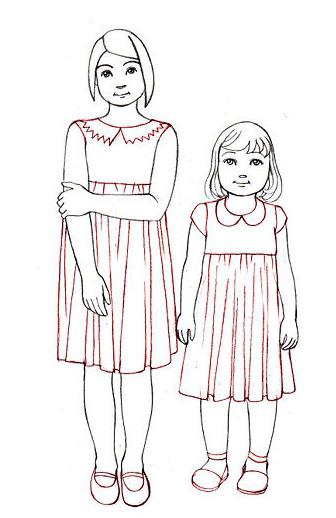
We must not forget about the shadows on the face, clothes, arms and legs when we draw children with a pencil. Step by step the shadows are drawn like this:
- Outline the shaded area.
- Mark the light areas so as not to paint over them.
- Smoothly shade the darkest shadows.
- With a harder pencil, make the transition to penumbra.
Environment
Having specified all the details, we proceed to drawing the background. You can depict an indistinct shaded spot. Against this background, the figure of the child will look contrasting and expressive. If you want to add atmosphere, you can draw a room, a forest or a ship's deck. The main thing is realism. Pay attention to the texture of objects: wood, stone or clouds - these shapes can be shaded in different ways. For example, softer shading is suitable for fabric; for a tree, rough strokes denoting bark. Do not overdo it with the background so that it does not distract the viewer from the human figure.