print Thanks, great tutorial +2
Foxes are very cunning and dexterous red creatures. However, there are also nice and kind ones. To do this, you need to make it out of paper using the origami technique. When making such a cute and kind fox, you do not need glue. All you need is dexterous fingers and attentiveness.
Necessary materials:
- Two squares of yellow or orange 10 x 10 cm
- Black marker or marker.
Step by step photo lesson:
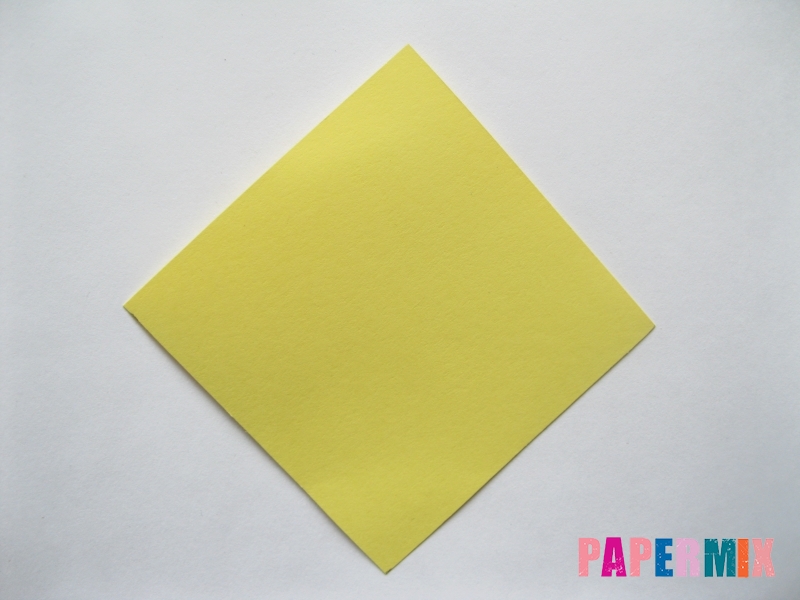
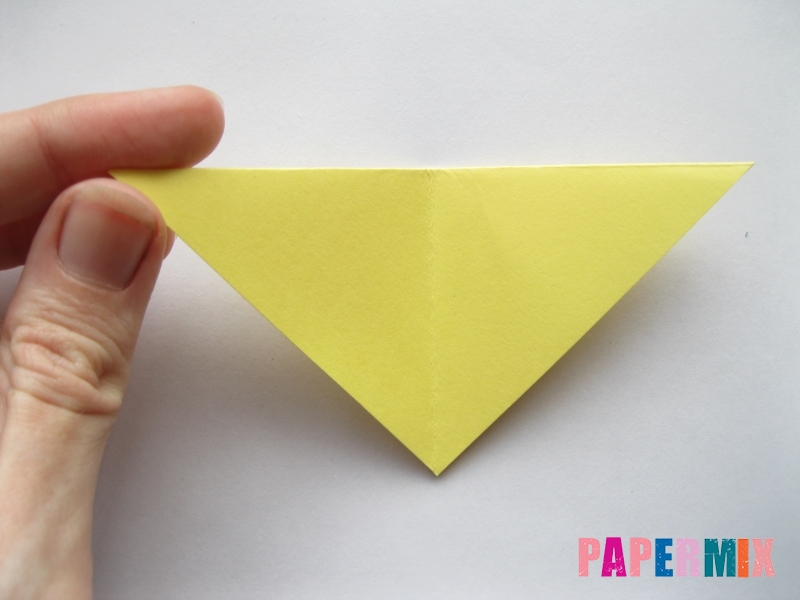
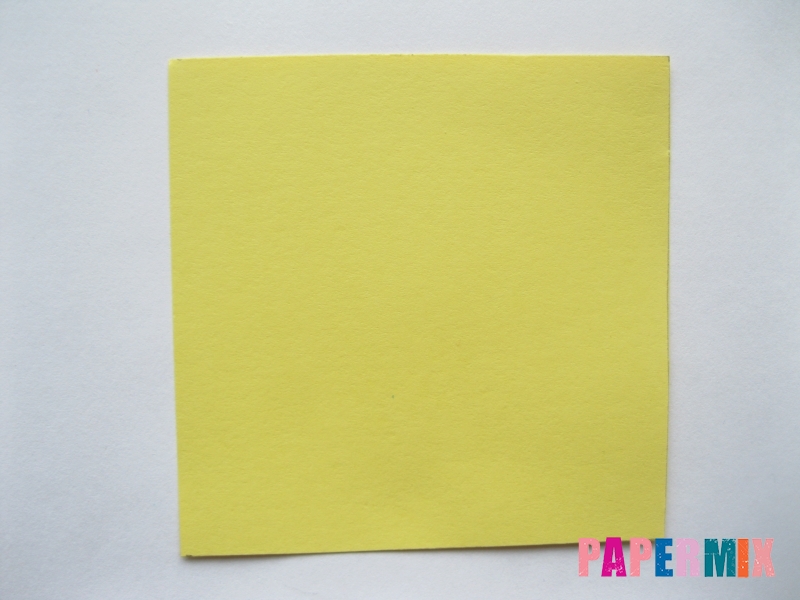
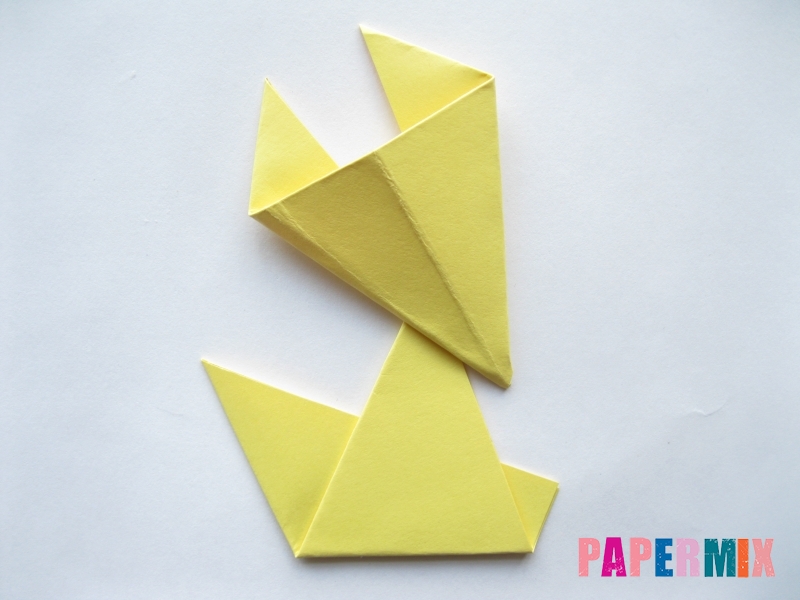
We make the head of a fox. This will require one square. Let's put it with one of the corners up.
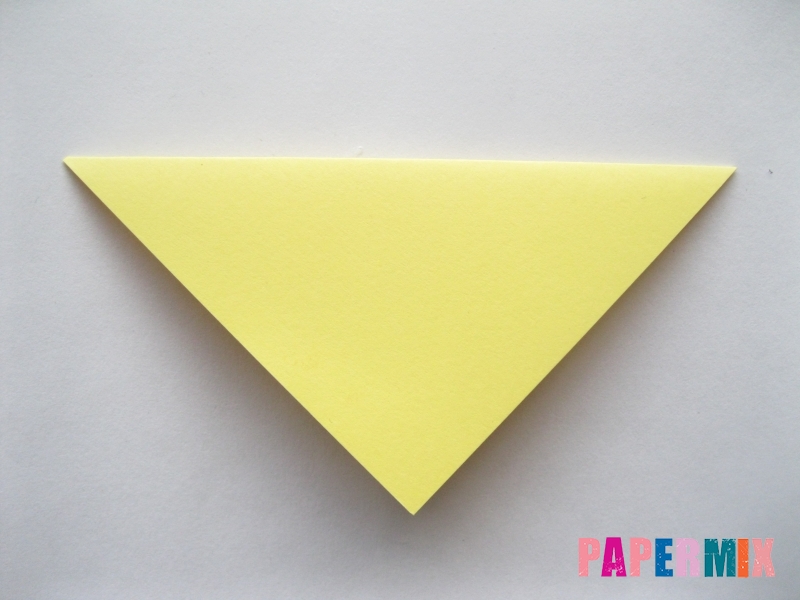
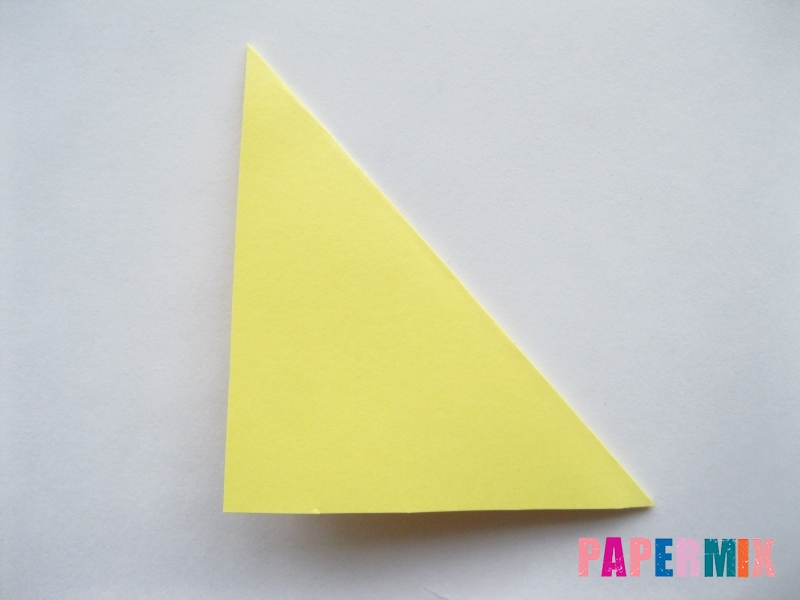
We bend in half.
Expanding. It turned out in the middle of the fold line.
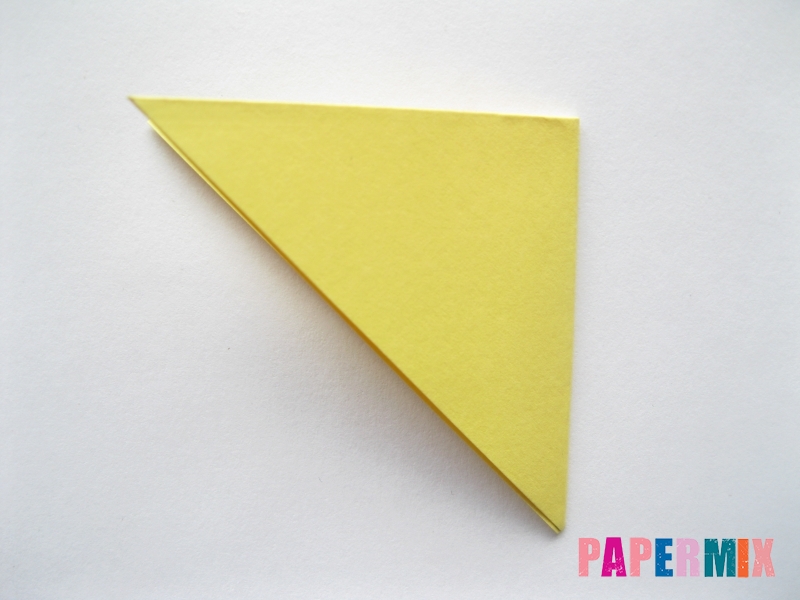
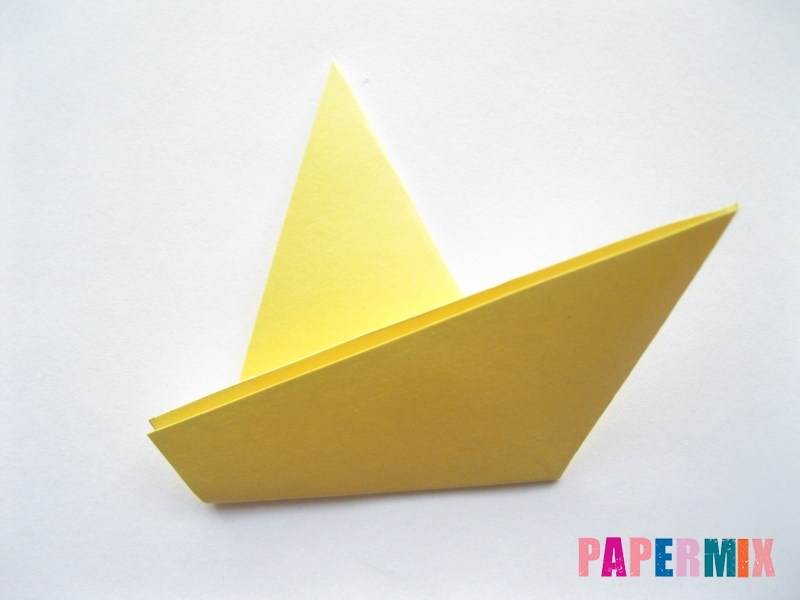
We wrap the right corner of the triangle up a little obliquely.
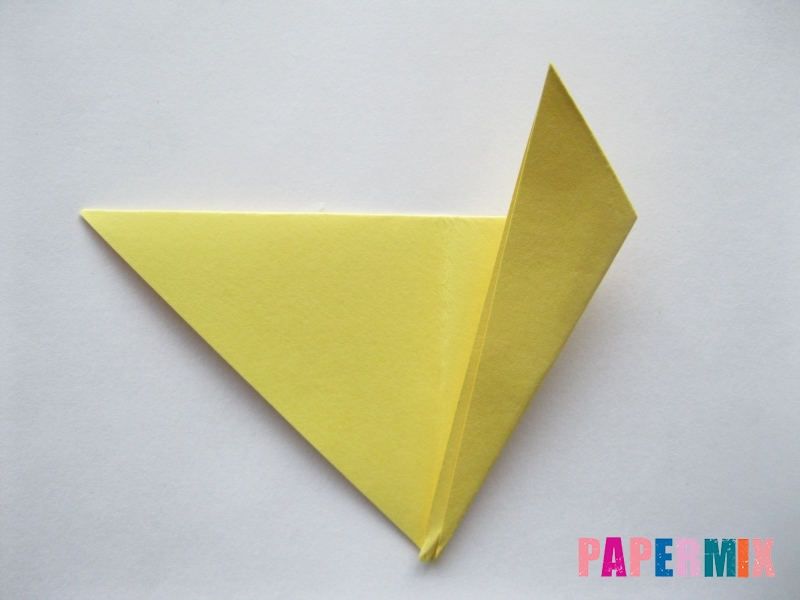
Repeat the previous step with the left corner.
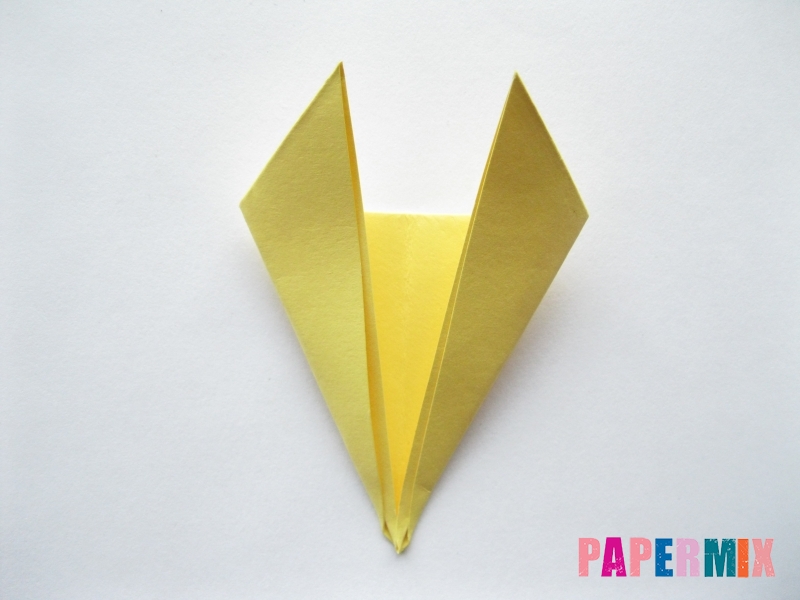
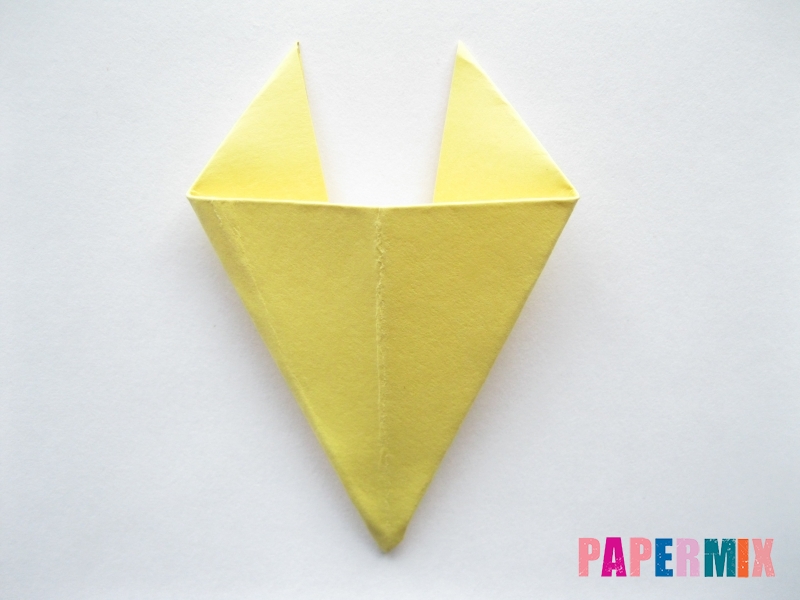
We turn the blank for future crafts.
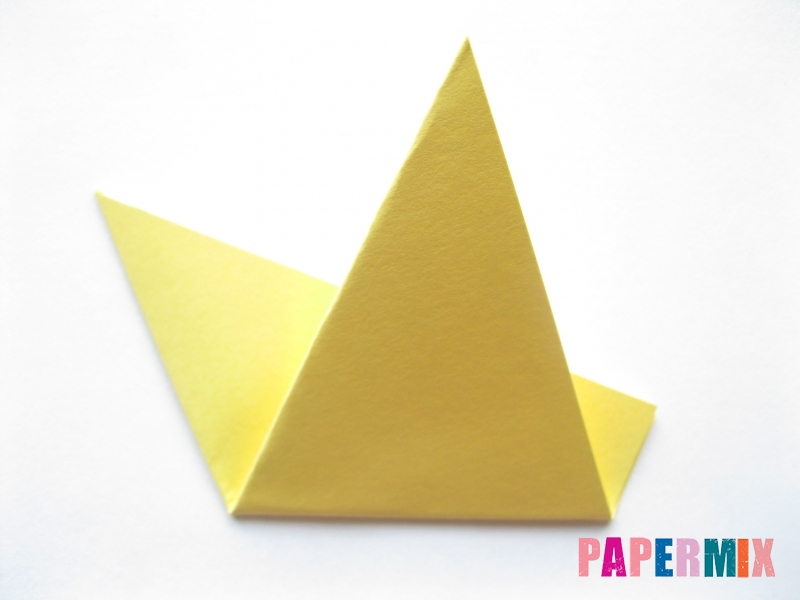
We make the body of our cute fox. To do this, we will prepare another square, which should have the same color and dimensions as the first one.
We bend the square.
We turn the lower part up a little and obliquely.
We turn over.
We combine the body and head together.
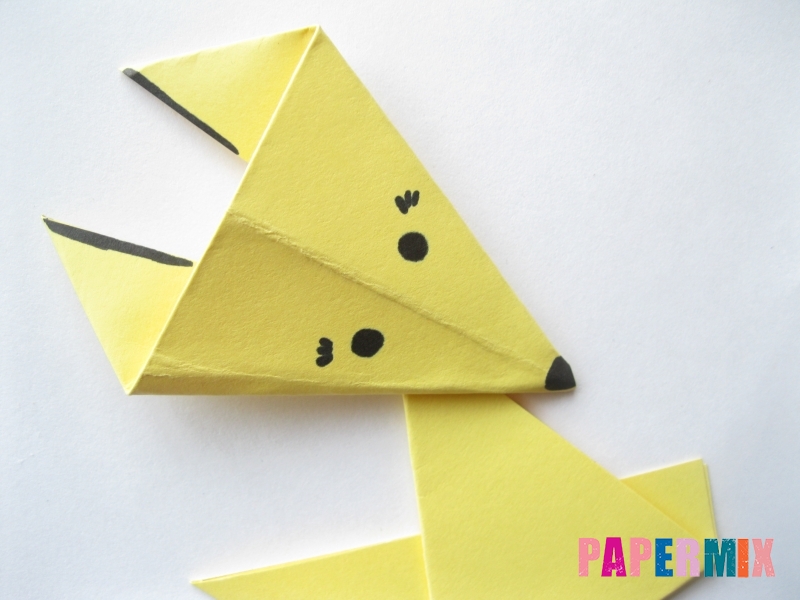
With a black marker, now draw the small features of the fox's muzzle. On a sharp corner we will draw a nose, but a little higher we will place two bold dots, which will indicate the cunning eyes of the fox. The contour of the ears can also be painted with a black marker and outline the craft.
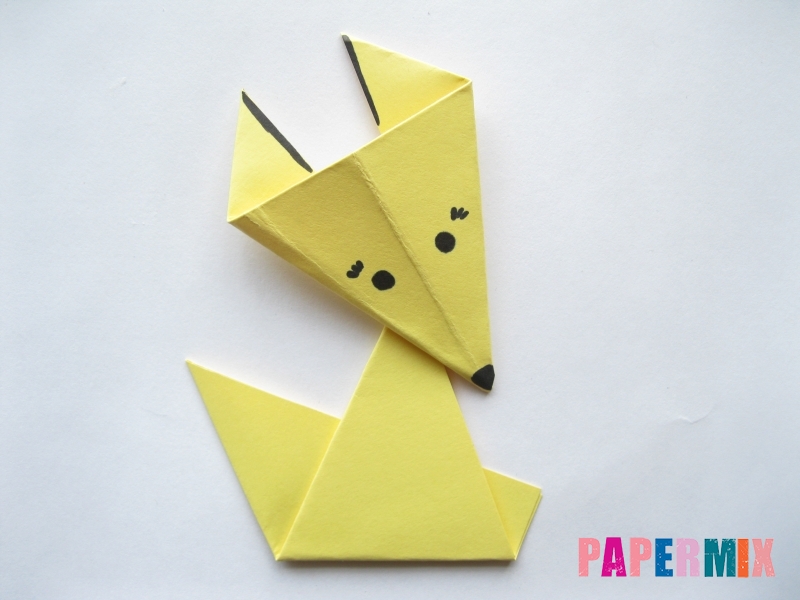
Our origami colored paper fox is ready! With such a craft, you can safely look for colored cardboard and decorate a picture that will become a gift for a friend or just a beautiful decoration in the room.
Video lesson
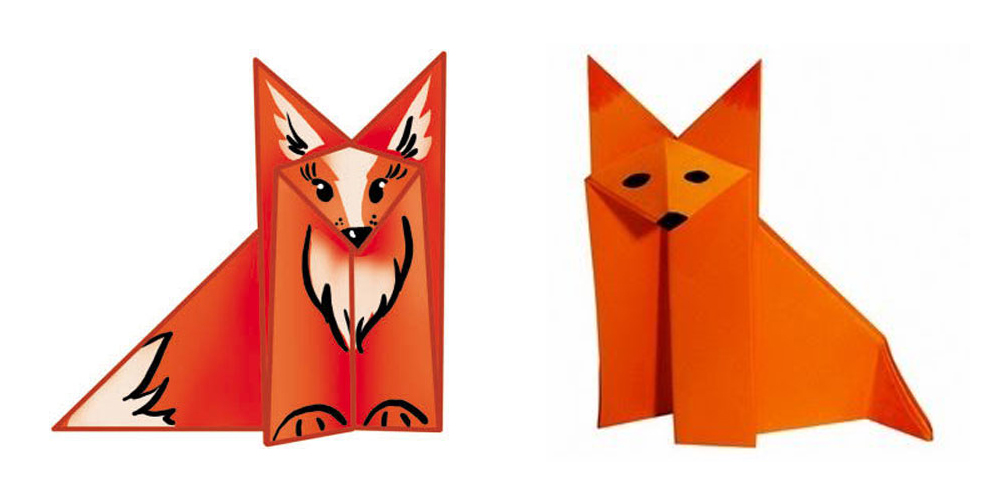
Origami fox is one of the most popular paper origami. If you do not know how to make an origami fox, then on this page you will find everything you need to assemble this simple paper figurine.
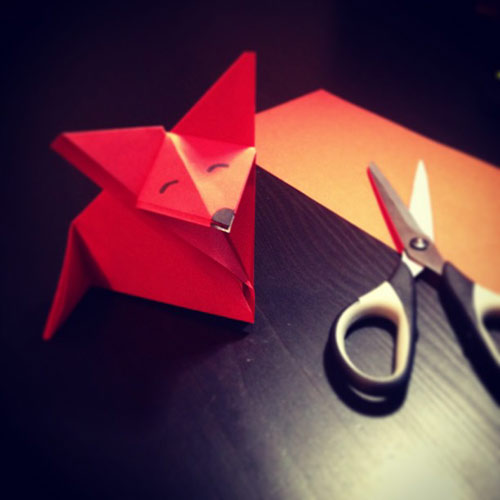
In the first photo you can see what you get if you follow the assembly diagram below. The second photo of the origami fox was taken by one of our site users. He got about the same fox as in the first photo. It is unclear why he used scissors. If you have photos of the origami you have collected, send them to the address This email address is being protected from spambots. You must have JavaScript enabled to view.
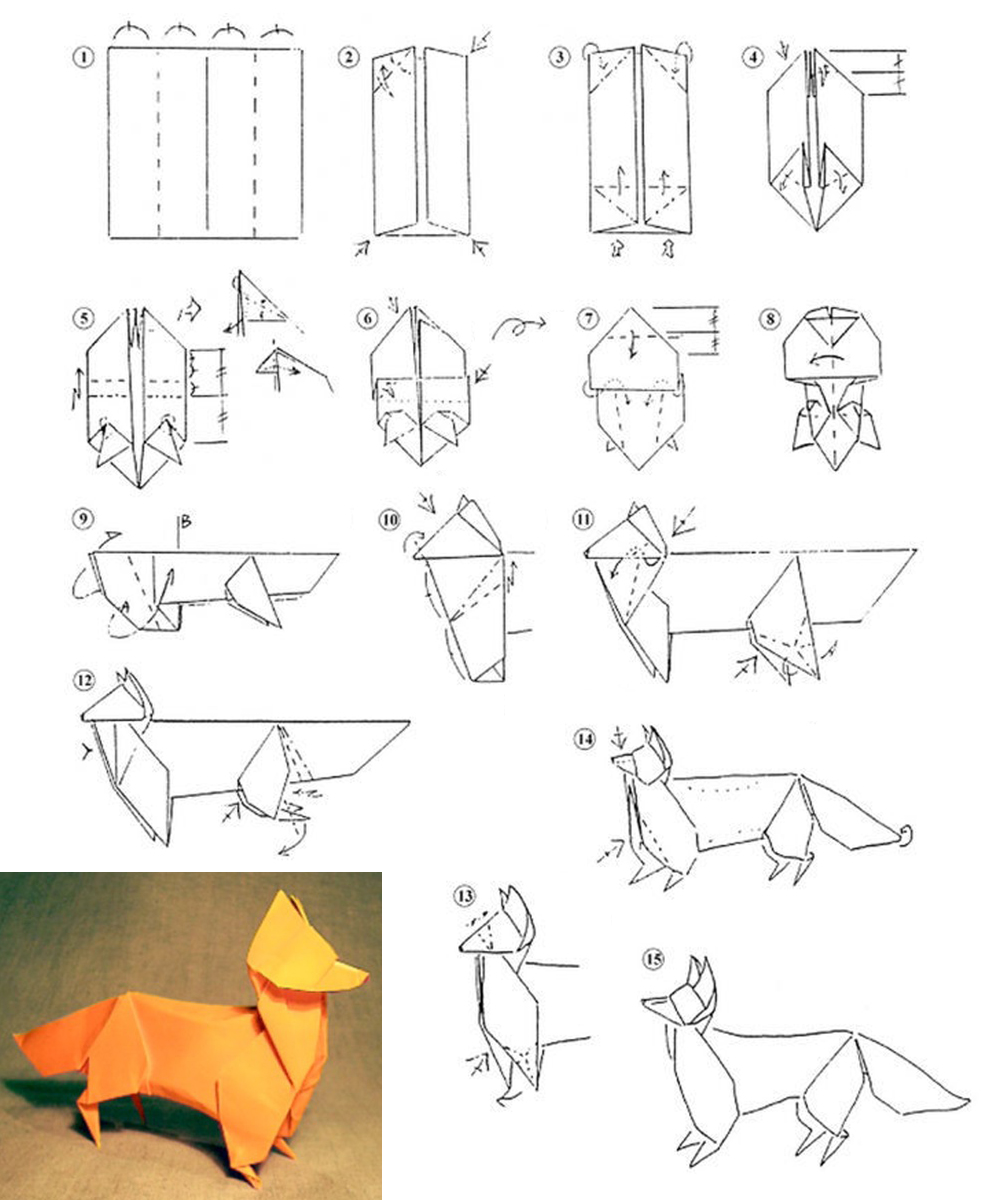
Assembly diagram
Below is an assembly diagram of an origami fox from the famous Japanese origami master Fumiaki Shingu. If you strictly follow the instructions, then the assembly of the origami fox will not take much time, and the result will be the same as in the picture. After doing what is described in the diagram several times, you will understand how to make an origami fox quickly and without peeping into the diagram.

Videos master class
Assembling an origami fox for beginners can seem like a daunting task. Therefore, we advise you to enter the query "origami fox video" on the largest video hosting site on the Internet, YouTube. There you will find many different videos about the origami fox, which clearly show the steps for assembling the fox. We hope that after watching the video of the assembly master class, you will have no more questions on how to make an origami fox.
This video tutorial will teach you how to assemble a simple origami fox:
If you want to build a more complex paper fox model, watch this video:
Symbolism
The fox in many cultures is a symbol of cunning, deceit and treachery. In Asia, the fox is considered a symbol of eroticism and feminine beauty. Some believe that the fox has a secret connection with the dark forces, and consider it a sharply negative symbol.
How to make a paper fox with your own hands
The basis of this craft is a cone. We will tell and show you two options for making paper foxes.
Before doing the craft, children can guess a riddle about the fox, read poems about the fox and be sure to remind them of the safety precautions for working with scissors and glue.
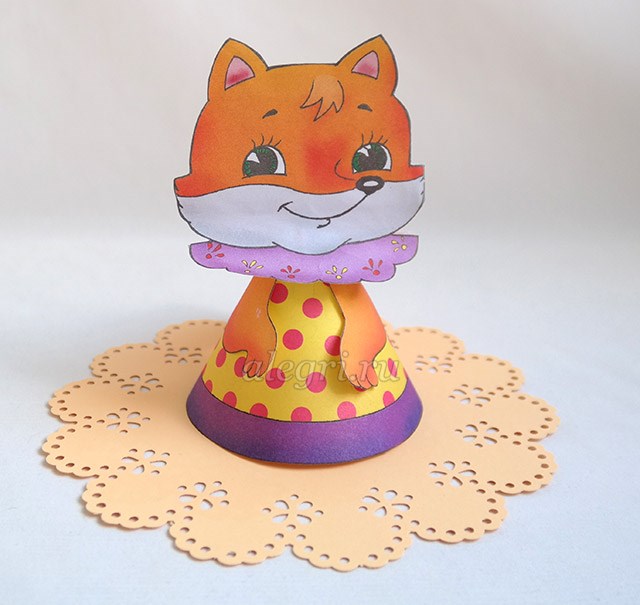
Paper crafts for children 5-7 years old. A fox
To make a fox you need to cook:
Scissors;
Templates
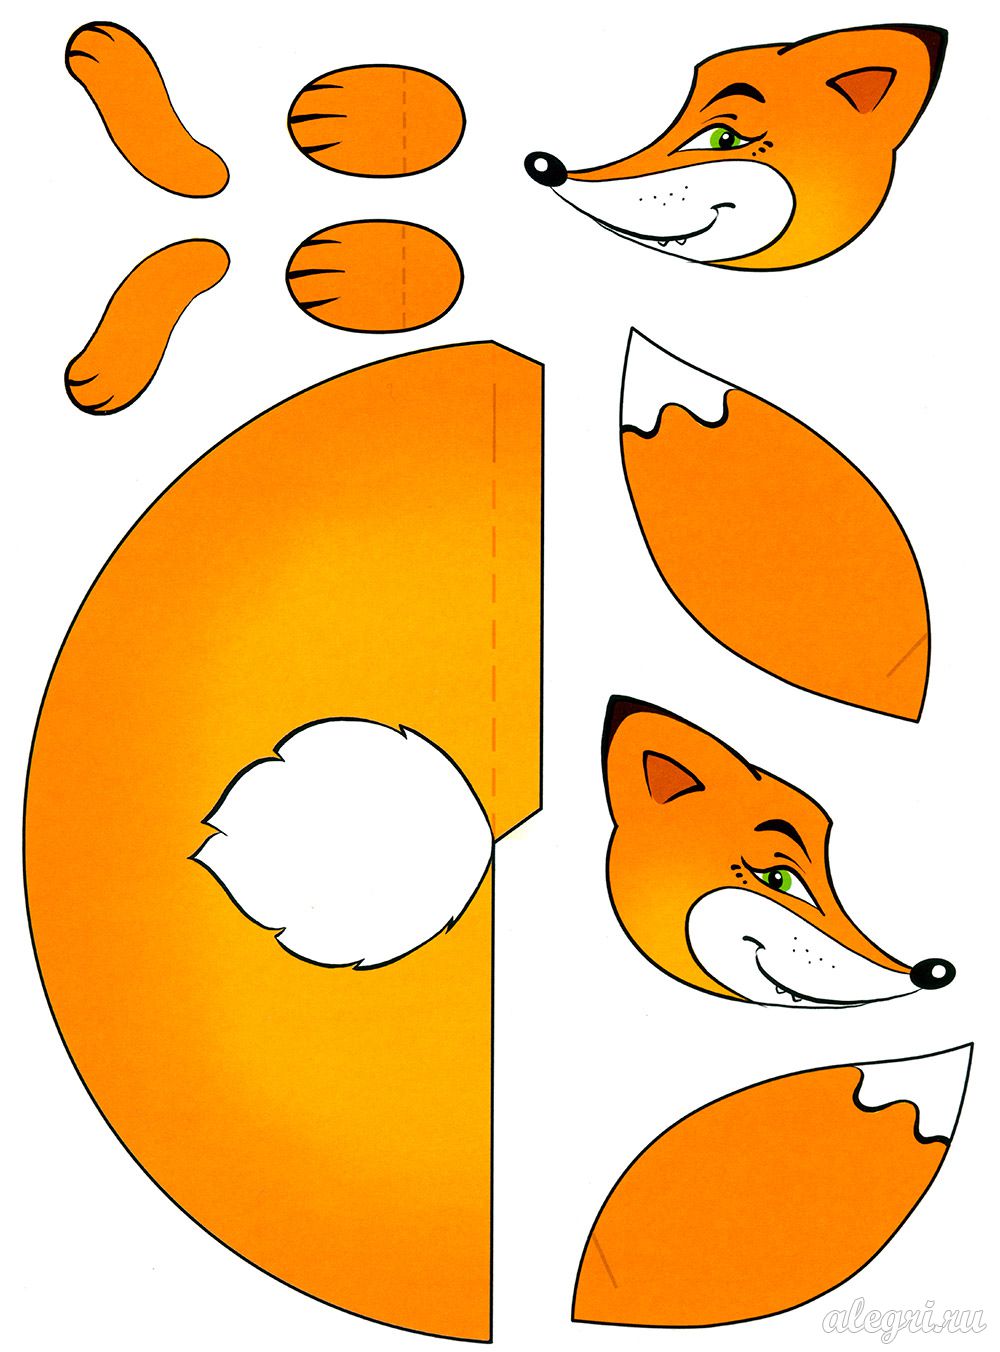
Step by step process of making Cockerel
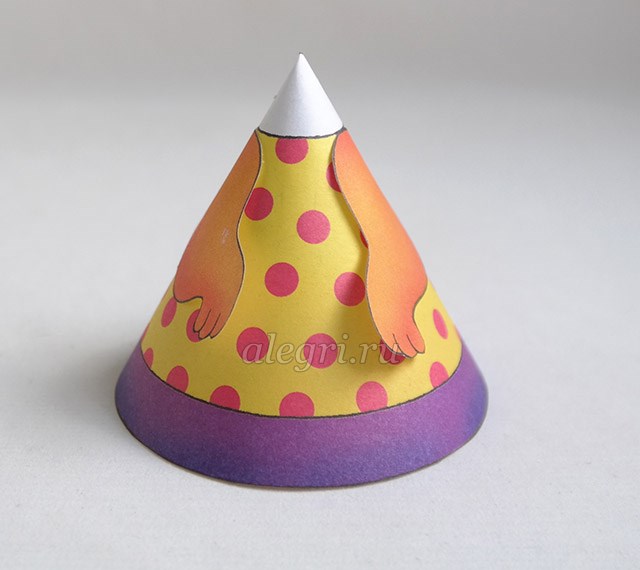
1. According to the templates, we cut out all the details of the fox figurine.
2. By dotted lines bend the valve.

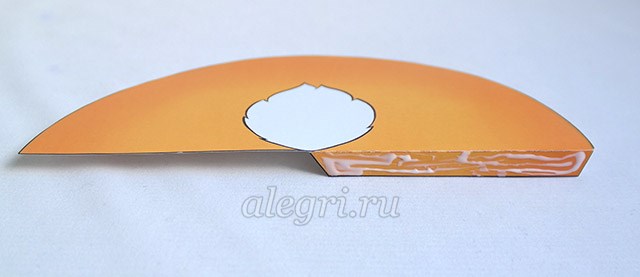
3. Lubricate the valve with glue and glue the base - the cone.

4. We glue the head to the base-cone (we glue one part of the workpiece with glue and glue the second part on it)
5. Glue the hands of the fox.
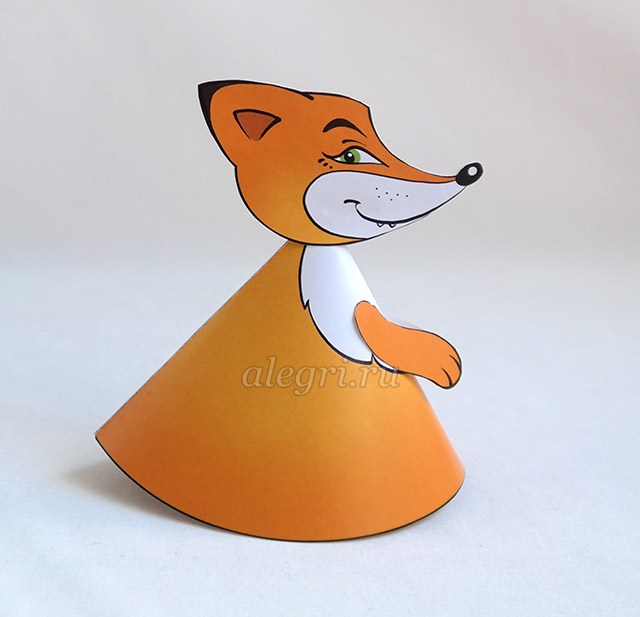
6. Glue the tail (after bending it along the line)
7. We bend the paws along the dotted lines.
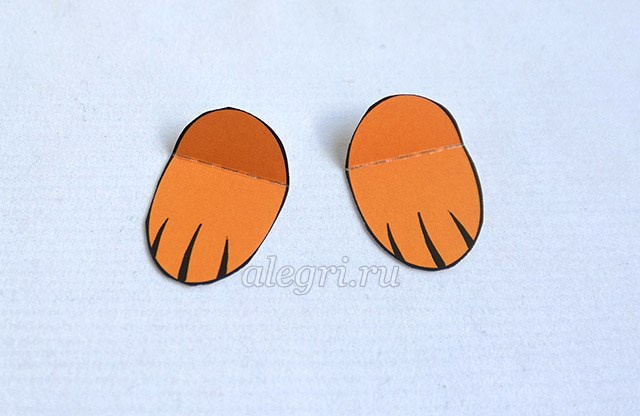
8. Glue them to the base.
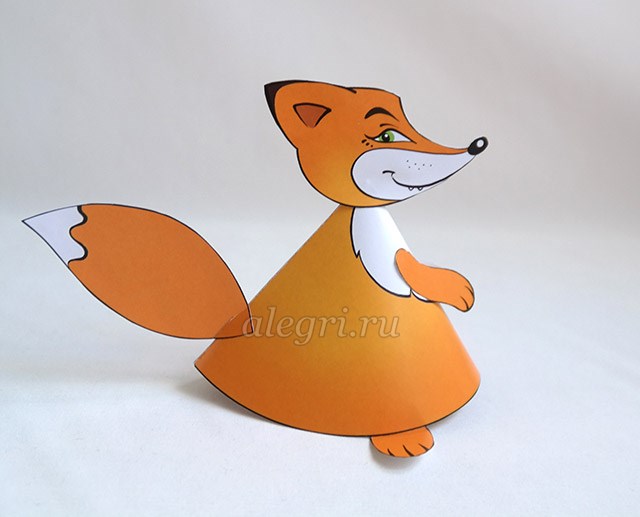
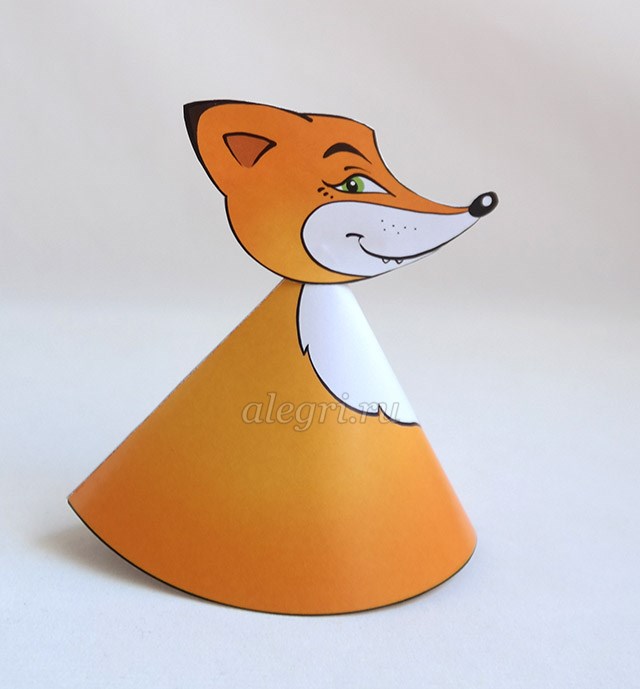
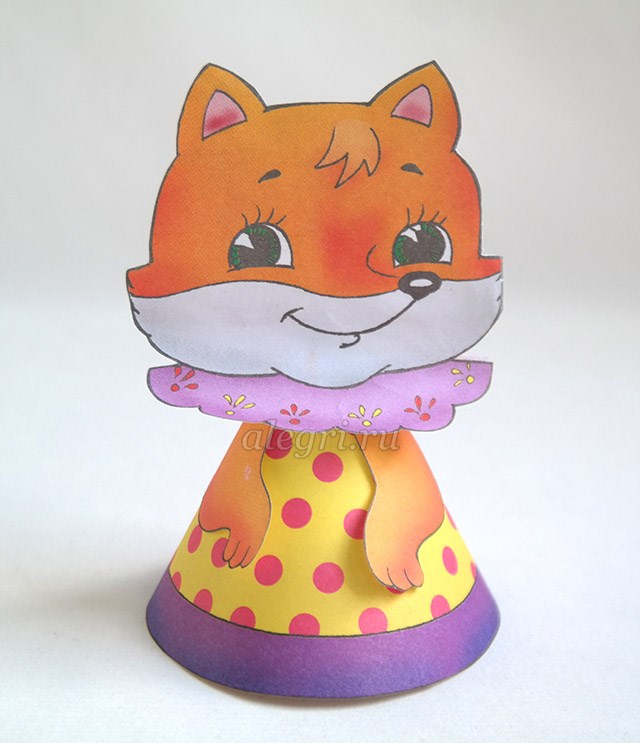
9. Our Chanterelle is ready.
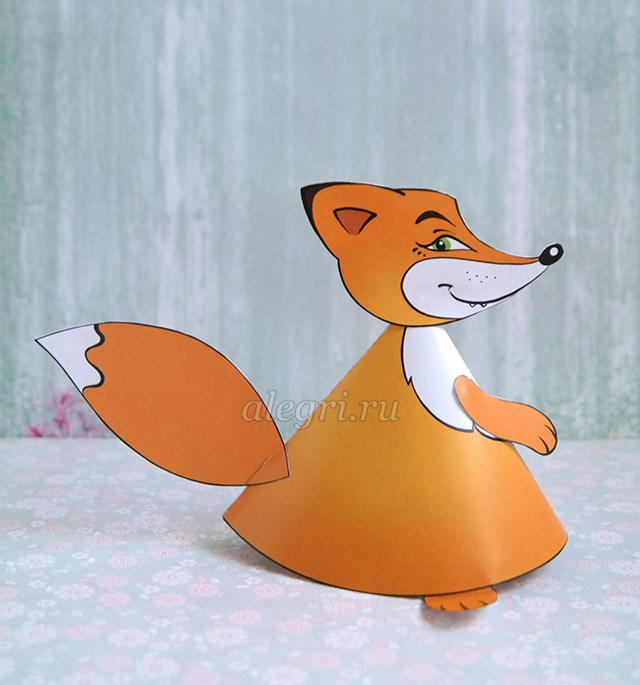
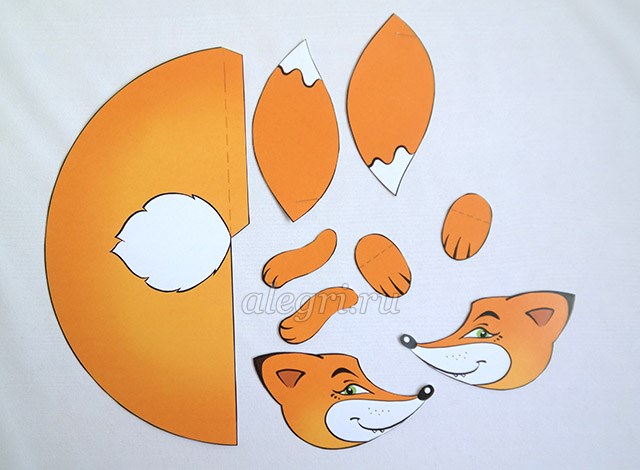
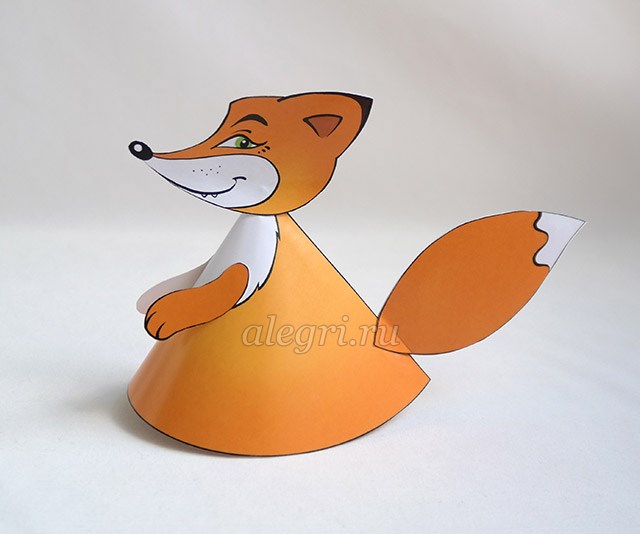
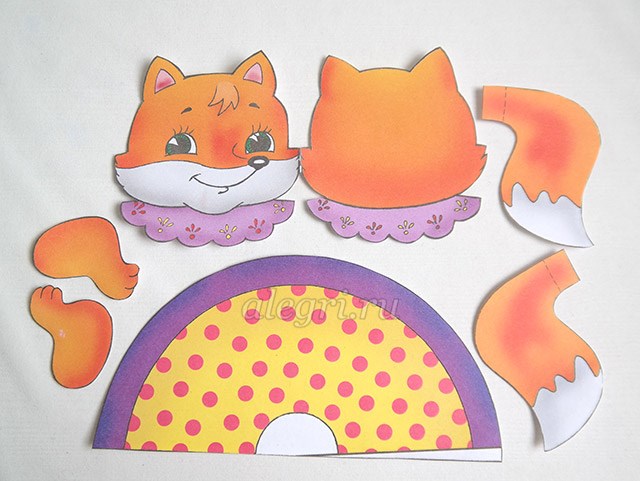
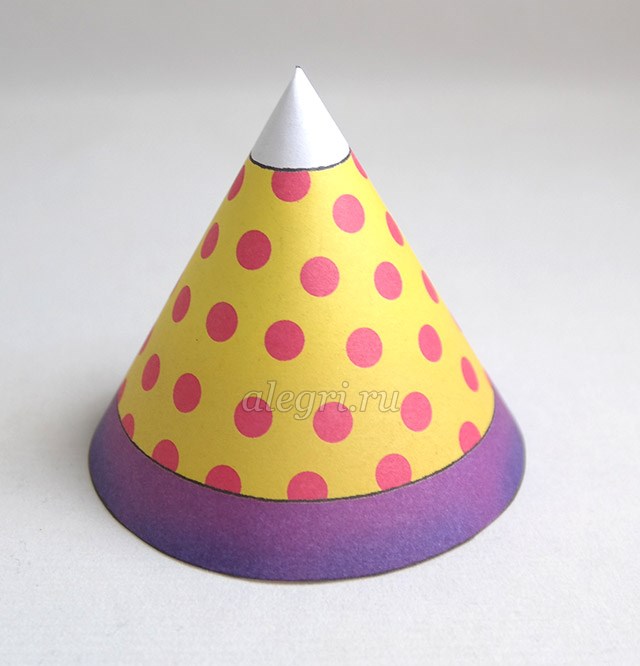
Chanterelle-sister from a paper cone. Step by step instructions with photo
1. Print or redraw templates.
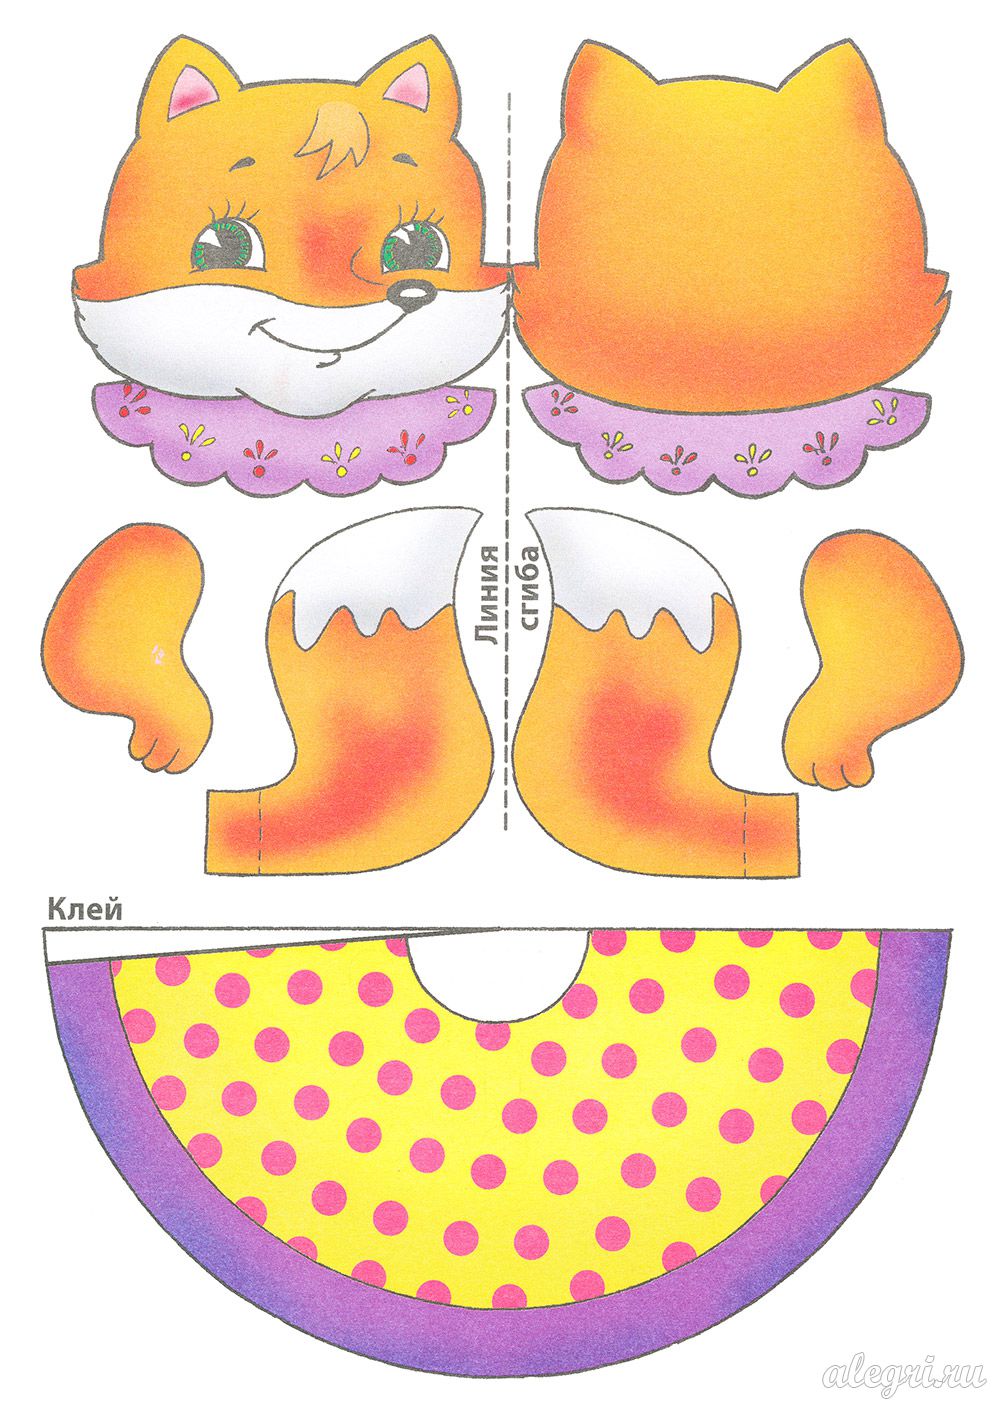
2. According to the templates, we cut out all the details of the fox figurine.
3. We turn the cone from the cut out semicircle.
4. Glue the hands to the cone.
5. We glue together the details of the head (the lower part remains not glued!)
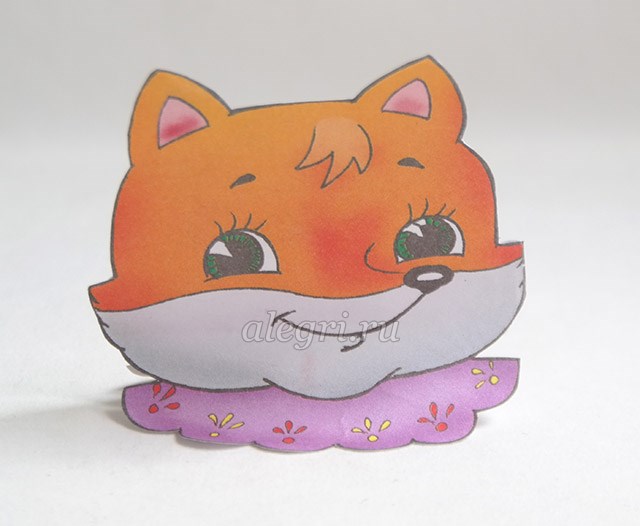
6. Glue the head to the top of the cone.
7. We glue the tail parts together, leaving the valves not glued.
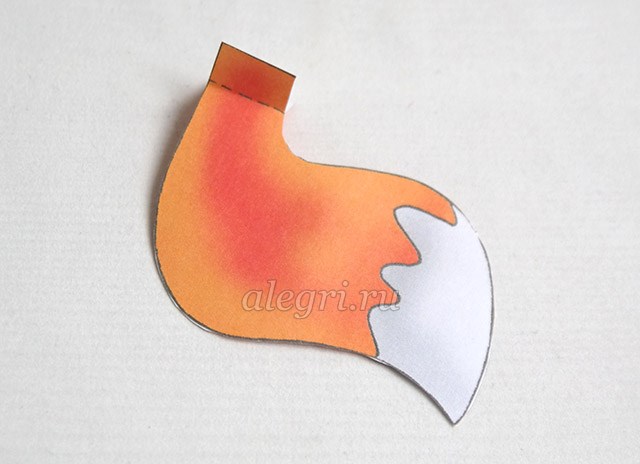
8. Glue the tail to the cylinder.
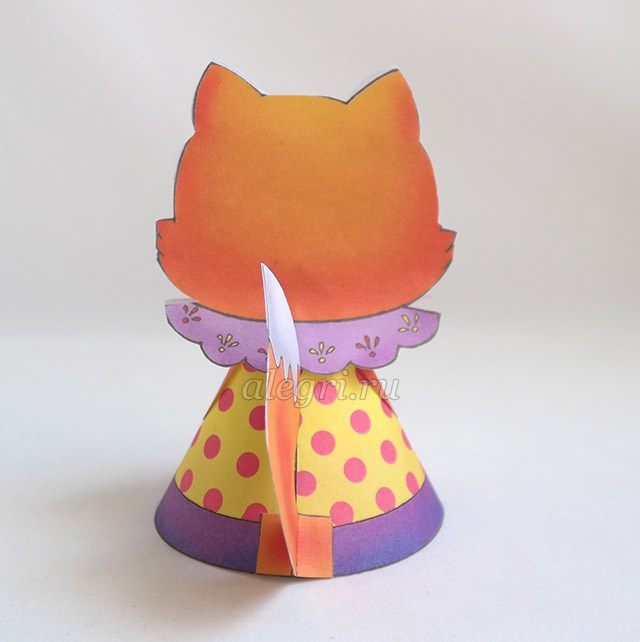
9. Chanterelle is ready
Isn't it time for us to add new inhabitants to the paper zoo? Today, the origami fox will replenish the collection of animal figurines. We will talk about 3 types of folding of a cunning forest beauty, the more interesting it will be to assemble a whole fox family, where each toy will be unique. Take an orange, preferably double-sided, colored sheet and a black marker to draw a cunning muzzle for a fox. More will not be required. Now watch carefully how to make a fox out of paper in no time.
Paper fox: option 1 - a simple toy
The first paper fox can be done even by kids. The following schemes will be more complicated, the more interesting it will be to tinker with them. We need a square piece of paper of a suitable color. You can make it from white office paper, and then color your animal or entrust this activity to children. Next, fold the paper in stages:
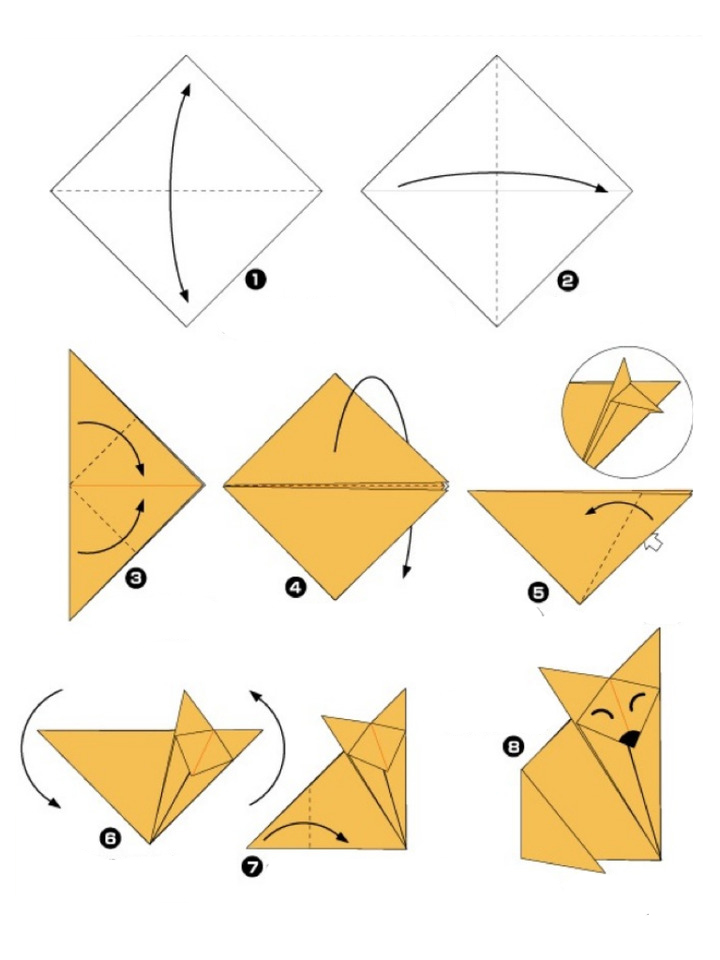
- Fold the square of the sheet diagonally, then fold it in half along one of the bends into an isosceles triangle;
- Bend the sharp corners of the resulting triangle to an obtuse corner. See fig. 1, step-by-step instruction in pictures will not allow you to make mistakes;
- Now fold the workpiece in half away from you. Having captured all 3 "walking" corners, bend them towards you, focusing on the vertical axis of the convolution;
- Then lay out the folded corners - the extreme ones will become ears, unfold the doubled central corner (from the inside) and squeeze it, forming a muzzle of a fox out of paper;
- Bend inward a tail of colored paper, due to which the fox will become stable. The origami fox is ready, it remains to draw her eyes and nose.
Here is what you should get:

Paper fox: option 2 - Japanese fox
Do you want to know how to make an origami fox in a classic Japanese technology? Everything is incredibly simple: by analogy with the first simple version of the toy. Here you will also need a square of paper sheet. Scheme 2 converges with the first instruction in paragraphs 1-2, then this origami fox folds a little differently. Proceed step by step, first repeat steps 1 and 2 (the previous fox craft is simple from a square), and then:
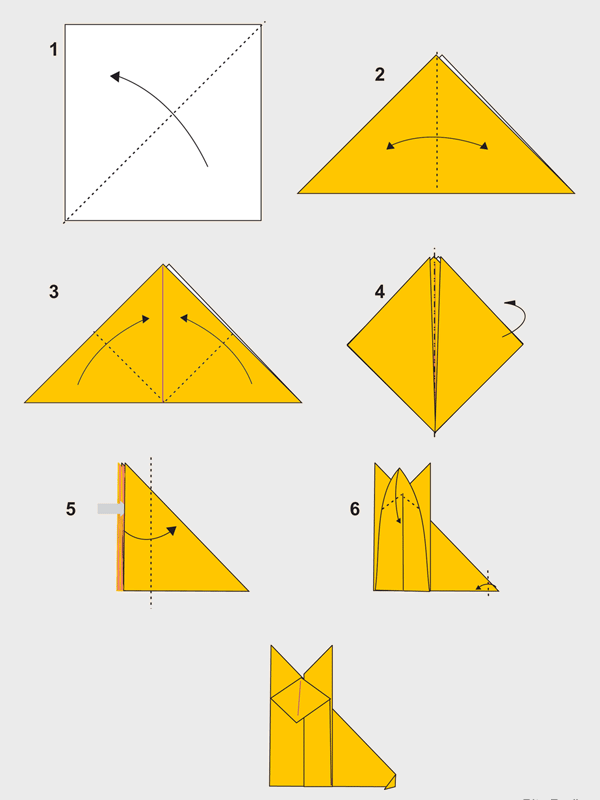
- Bend towards you not “walking” corners, but a strip of plane on this side (as shown in Fig. 2). So you set the supporting "legs" of a cunning animal;
- Next, expand the muzzle of the fox from the middle corner, straighten the ears and arbitrarily bend the tail so that the origami fox stands confidently, paint the fox out of paper.
We made it again! Hooray!
Paper fox: option 3 - voluminous complex toy
Ready to learn how to make a fox out of paper with your own hands, so that the beast looks like a real animal as much as possible? Then let's proceed to the analysis of the 3rd (most complex) scheme. She shows us how to make an origami fox with detailed anatomical study of body parts. The scheme is not easy, but you can be proud of yourself if you still manage to master the intricate folding technique. So:
- Fold a sheet of paper from a horizontal orientation so that its side edges converge in the center, then the origami paper blank must be sharpened from the bottom and top. To do this, bend inward all 4 corners of the convolution, then unfold them (you need outlines of the faces);
- Open the lower corner "pockets" from the inside (both) and squeeze along the plane. But the upper corners should not be opened, but tucked inward (both). Did you manage? We make a paper toy for children further;
- We bend the upper corners (future ears) towards ourselves, focusing on the palpable groove. The ears need to be folded towards you again, reducing the resulting regular triangle. The ears overlap one after the other (see Fig. 3);
- Bend the corners of the lower edge sticking up downwards, fold the bundle in half (basting the central axis) and return it to its previous position. Fold the structure along the axis with a step (accordion), as shown in Fig. 3. The bottom part now overlaps the top a little. We bend the corners of the step towards ourselves;
- Turns the bundle face down and bends the head of the future fox towards him - the upper corner of the blank. Next, make limbs-separators of the front paws from the hind legs towards you (see Fig. 3 carefully);
- Acting strictly according to the scheme, systematically form the details - paws, voluminous muzzle, tail. At first, the origami fox will seem angular, but then it will take on a spectacular final shape. You can watch the video if it is difficult to understand the scheme.