Master class with step by step photos: “The spider on the cobweb”
Author: Smolnikova Natalya Nikolaevna, teacher of MBDOU “Kindergarten No. 118”, Cherepovets, Vologda RegionDescription of work: The master class is designed for older preschool children; educators, passionate people.
Appointment: This craft is designed for autumn layout in kindergarten, decor, or group design.
purpose: Making spider crafts for the layout.
Tasks: Develop fine motor skills of hands, creative imagination; cultivate perseverance when creating crafts (spider).
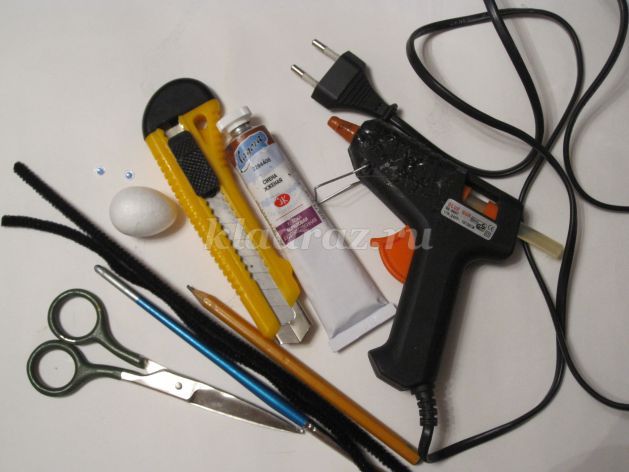
Materials:
1. Foam egg
2. Black chenille wire
3. Scissors
4. Acrylic paint in gray and black, brush
5. Stationery knife
6. A simple pencil
7. Toy eyes
8. Glue gun (or glue "Crystal Moment")
Golden autumn has come. Every year in our kindergarten there is a competition of autumn crafts. And I got the idea to create an autumn layout “Magic web of autumn”, but what kind of web without a spider.
In nature, everyone knows a weaver -
The spider is a joker and a dodger.
Catch the midge in the net
And, well, swing the baby in it.
1. The master class itself is quite simple and quick to execute. Materials are readily available and inexpensive.
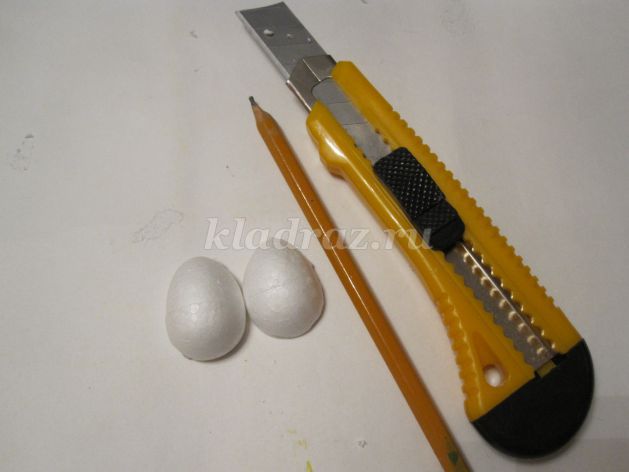
2. Take a foam egg, draw with a pencil a line dividing the egg in half, then cut it with a clerical knife.
3. We paint one half of the egg with gray acrylic and the other with red (there will be a “ladybug”). On the back of a spider we draw a cross with black acrylic paint.

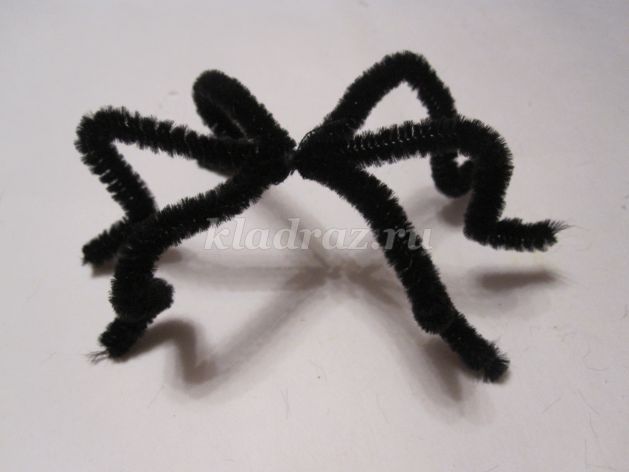
4. We take chenille wire -2 pieces, cut in half
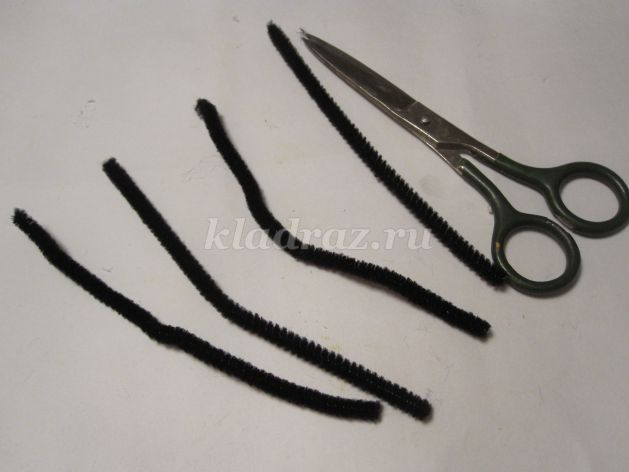
And we connect in the middle with a thread or a thin wire.
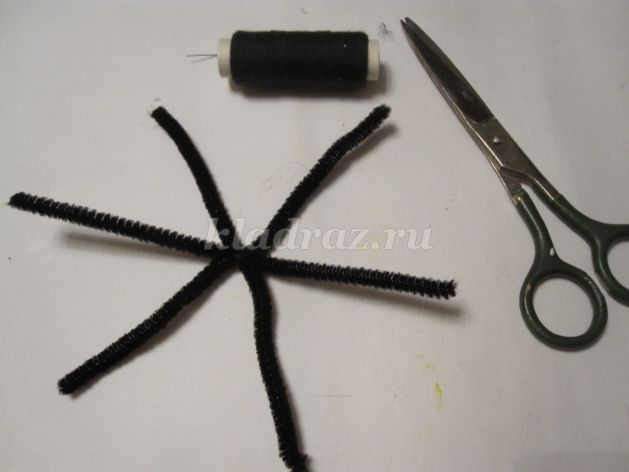
The legs need to be bent
5. Then, using the glue gun (or you can use the glue “Moment”), glue the paws to the half of the egg, glue the “eyes” on top,
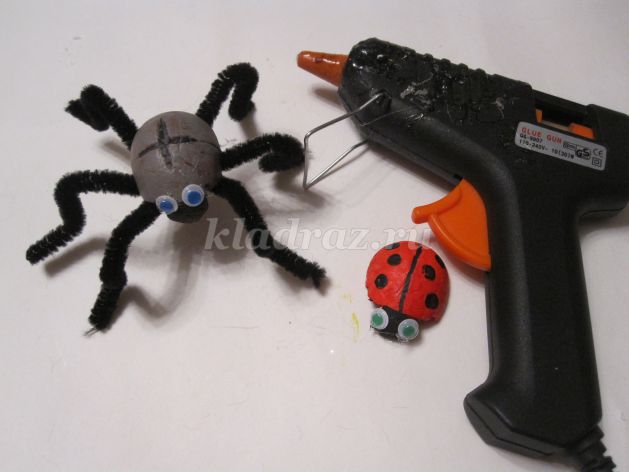
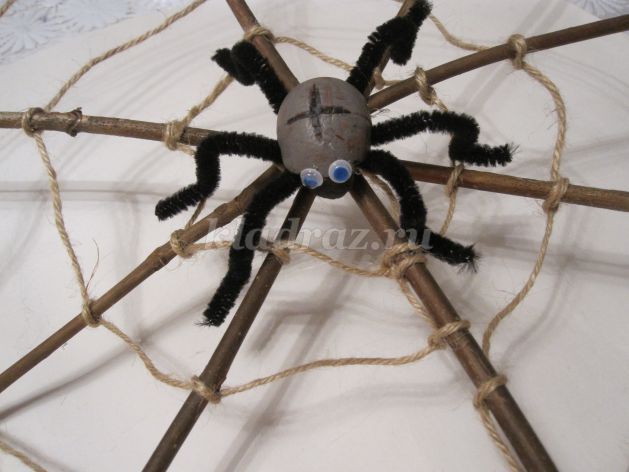
Then we glue the spider on the cobweb, which was made of twigs and twine.
6. You can also decorate the cobweb with leaves of foamiran (or colored paper).

They are "cut down" with the help of a figured hole punch.

If there is no hole punch, then you can cut it with scissors. We also glue the leaflets on the cobweb, and glue it there " Ladybug". And then we place a spider web on a breadboard. Creative success to all!
So the time has come for mushrooms. It's time to go to the forest, where we are waiting not only for russula and sub-birch trees, but also a lot of interesting things. Among the branches we will meet more than once a thin lace spider web, which is sure to attract the attention of the baby.
Among the branches a spider
I made myself a butterfly net.
The web is so easy!
Nice house at the spider.
And why not try and make a cobweb yourself, and not put a spider on it? And if you also need to bring a do-it-yourself spider on the web to your garden or school, all the more so to you. Choose from a variety of options how to make a spider crafts on the web or without it from paper, natural material, threads, chenille wire, egg trays and much more.
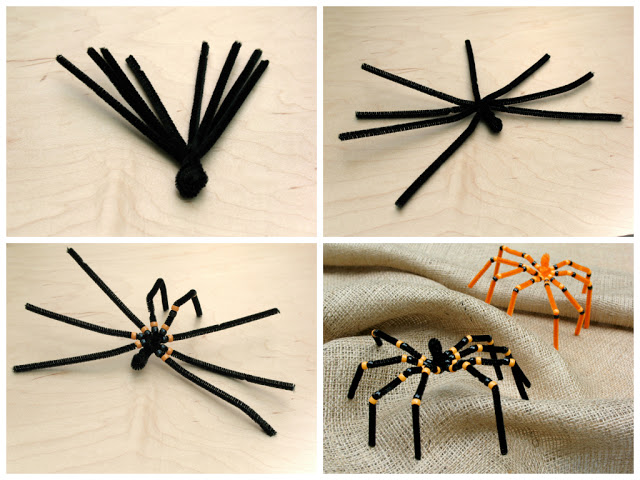
HOW TO MAKE A SPIDER CRAFT FROM THE CHEESE WIRE AND TRAYS FROM EGGS BY OWN HANDS
Perhaps the easiest way is to use one cell from the egg tray as the basis. Paint it black, then attach the googley eyes, which you can buy in a handmade or decor store, or just draw and cut out of paper. The legs of a spider are most easily made from chenille wire (pipe cleaners). It can also be purchased at decor or needlework stores; the price is very affordable. In extreme cases, you can use ordinary wire, wrapping it with black thread or yarn, black tape or painted with black paint.
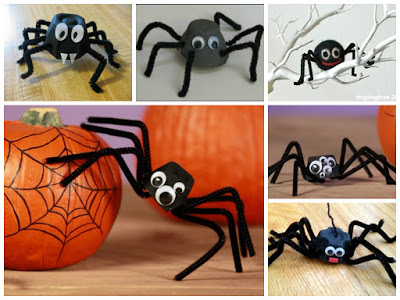
Cute spiders, right?
HOW TO MAKE A SPIDER ON HALLOWEEN OWN HANDS
Spiders are often used to decorate Halloween. On Halloween, they try to do something awesome, and the spiders, along with bats and mummies, just fit into this semantic series. Perhaps this way people struggle with their fears, because such lovely crafts of spiders are not at all scary)
Another way to beautifully decorate the room for Halloween is to make such cute spider nests from white yarn. For those who have already made a lampshade from threads, I think everything is clear here. Here are just a ball choose not a round, but more oblong shape. We dilute the glue with water, dip the yarn or dense threads, wrap the pre-inflated ball and leave to dry.

Lacing Fake spiders on the web from paper
But if you want to create a spider on the web, and even develop small motor skills for the baby, then we offer you the following lacing. Everything is simple here: download, print, laminate or paste onto thick paper, use the hole punch to make holes and invite the child to play a little. Black lace on a white background looks very beautiful. And when the child plays enough, you can hang it somewhere, using Halloween as a decoration. You can download it. Also in the file you will find themed laces mummy, pumpkin, monster and bat. Happy crafts to you!
MAKING SPIDERS ON THE WEB FROM NATURAL MATERIAL
And then we want to introduce you to many ways to make a spider on the web using natural materials such as hay, raffia, branches, chestnuts, cones, pumpkin, nuts and others. As you can see, for this craft you needed chestnut, toothpicks, nuts, black paper, glue and an awl, or any other tool with which you can make neat holes in the chestnut.
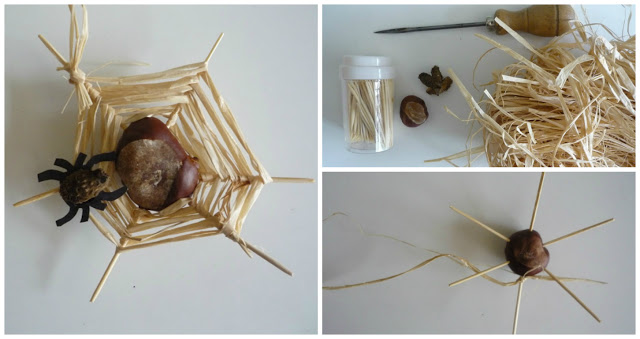
We think that all steps are shown in the photo instructions that we create so that you can clearly see each stage. Instead of natural or decorative raffia, you can use hay or ordinary threads. The option with raffia is more suitable for older children or for adults who want to create a beautiful autumn decor from natural materials.
MAKING SPIDERS ON THE WEB OF CHESTNUT
If you use longer sticks instead of toothpicks, and threads instead of raffia, you get such colorful crafts. Of course, this is not for the peanuts, but for the children of the older group and younger schoolchildren, they can completely cope with this task. Using the same chestnuts as a basis, you can make such cute spiders. The paws can be made of colored chenille wire, it will turn out very colorful and fun. 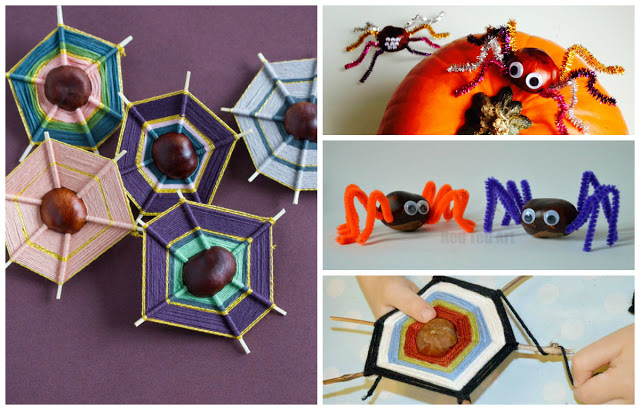
Nice, isn't it?
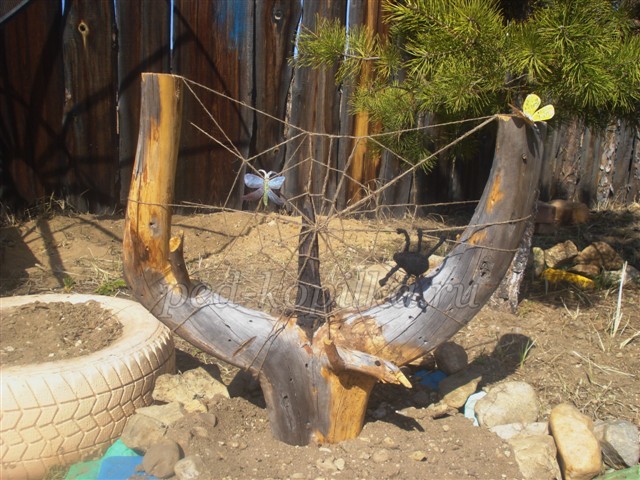
MAKING SPIDERS ON A WEB OF WEBS
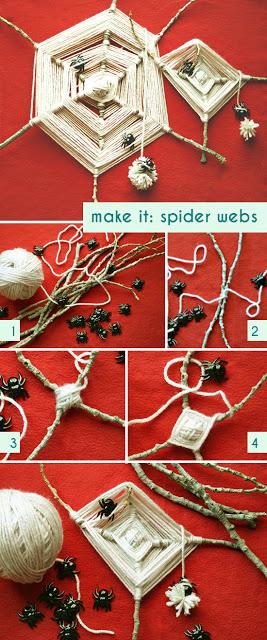
It is not necessary to use chestnut in the center, you just need to carefully connect the branches or sticks with each other, and then it's time to become like a spider and weave a beautiful web. A wonderful decoration for a room made of natural material is obtained. And such work will allow children to develop perseverance and attentiveness.
As you can see, the web can be colored or white, threads can be wound tightly to each other or at some distance, the main thing is that the child receives pleasure from this activity. And if you really want to correct it or do it differently, do not deny yourself the pleasure and make your own craft. The more decor and colors, the more beautiful it will be in your home ;-)
During weaving, you can introduce the child to such interesting facts about spiders:
1. A spider weaves its web from half an hour to several hours, so that it doesn’t work out that fast either. In addition, every day he has to update it in places of breaks and so that it remains sticky and allows you to keep the prey, because the main goal of creating a web is to cook dinner for yourself)
2. Web - one of the most durable materials on Earth. Spider silk is five times stronger than steel and two times stronger than heavy-duty artificial Kevlar fiber. Spider silk is able to stretch by 30% without breaking, so the web is very elastic.
 3. The spider never sticks to the web. This happens because the spider always runs only along smooth radial (coming from the center) threads, and never on sticky, concentric (circular) ones.
4. Where the victim is located, the spider determines by which thread is pulled.
5. The web is as light as it is solid. If a web once wound the Earth at the equator, then its weight would be only 450 grams.
AUTUMN CRAFT OF SPIDERS ON THE WEB FOR CHILDREN FROM PAPER AND PAPER PLATES
If weaving a network of threads and branches for too long or difficult for the baby, you can offer him the following alternative: use as a basis a paper plate, which, if desired, can be decorated with leaves or draw spiders in advance on it, and then weave the network.
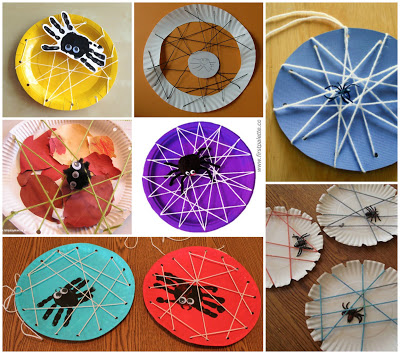
As you can see, you can make holes with a hole punch and thread the threads through them, you can use a pair of scissors to cut nicks along the edges of the plate, which you can then use to hook the thread, or you can offer the child who is learning or knows how to use the needle to thread the needle where he wants. There are many options. Perhaps, having looked at the proposed and evaluating the materials available, you will come up with your own wonderful idea. Share in the comments ;-)
Description of work: work is designed for children from 6-7 years old
Purpose of my work is: the development of creative abilities in children of preschool age through art work.
Tasks:
1. The development of creative abilities in children, the originality of the approach to solving problems, the ability to navigate freely in the environment;
2. Improving fine motor skills of the hand;
3. The formation of skills and abilities to work with various materials, devices and tools;
4. The education of accuracy, independence.
Course progress:
So, let's begin! For work, we need:
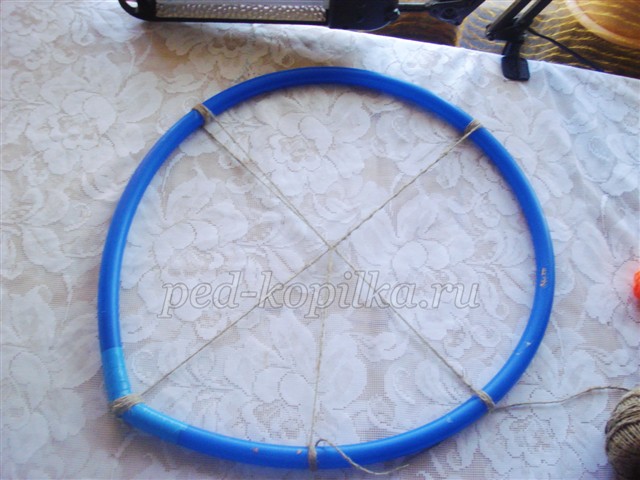
1. For the manufacture of our web: the base, it can be anything a hoop, a plastic tube connected in a ring, of any size. In our case, it will be a plastic tube connected to a ring. We will also need a roll of twine.
2. For our spider we need a skein of black yarn, a skein of copper wire (why copper, because it is very soft, you can give it any shape) and a small skein of any colored yarn.
Let's get to work and we will start with the web:
We take our ring and in any place convenient for you we attach a twine to it, then we fix the second end on the opposite side of the ring.
![]()
Then, as shown, we make rays from the center of our ring to the edges.
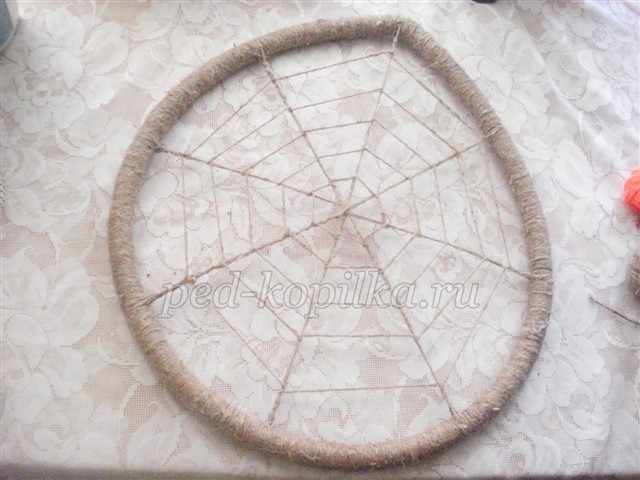
When we get at least eight rays, we can return to the center of our circle, stretch the twine so that we get a spiral.

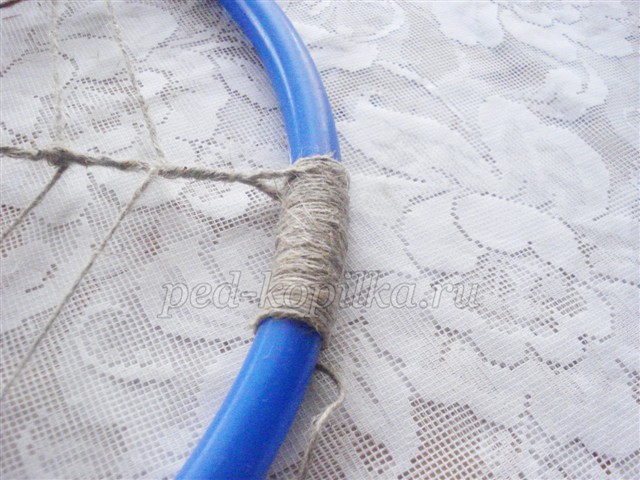
After you get the cobweb, we need to mask our ring, for this, with spiral movements, we wind the twine onto our ring, as shown in the figure.

And here is what we got:
We begin to manufacture our spider:
We will make three rods of copper wire about 20 cm long (the length of the legs depends on the size of your spider, the larger the spider the longer the rods).
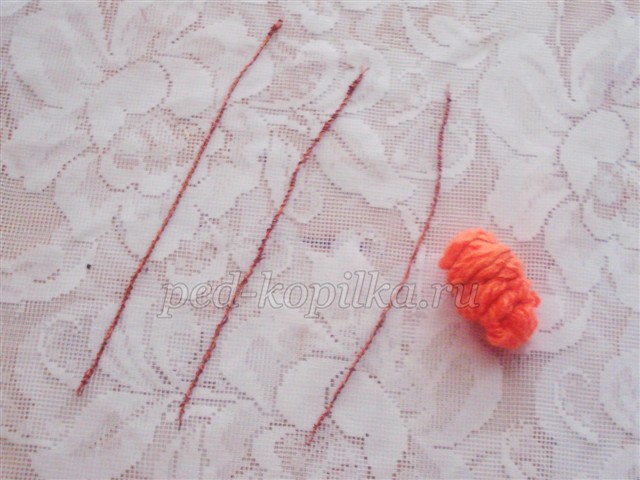
Now gently push our metal rods into our skein of colored yarn, as shown in the photo.
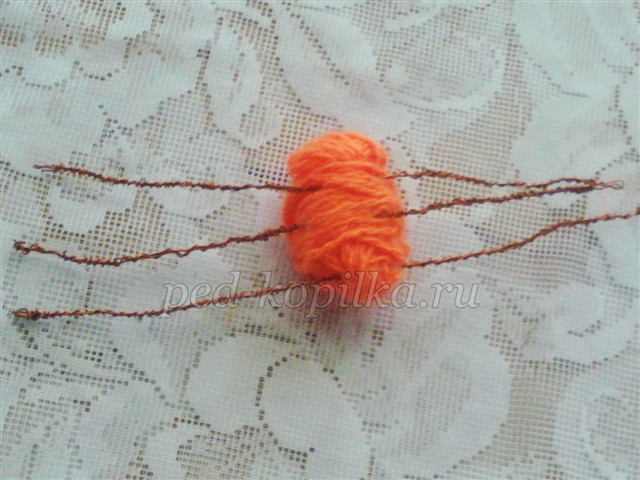
We take black yarn and from the head we wind it, not forgetting the legs of our spider
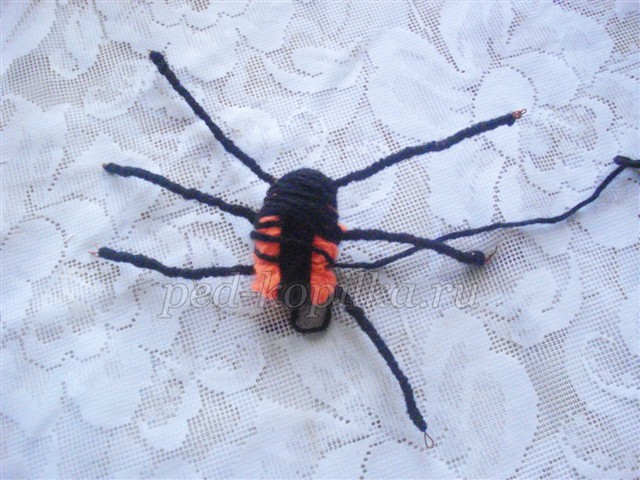
On the head of our spider, we leave small clicks for the eyes, we bend the paws so that the spider looks like a living spider.

Connect our two crafts:
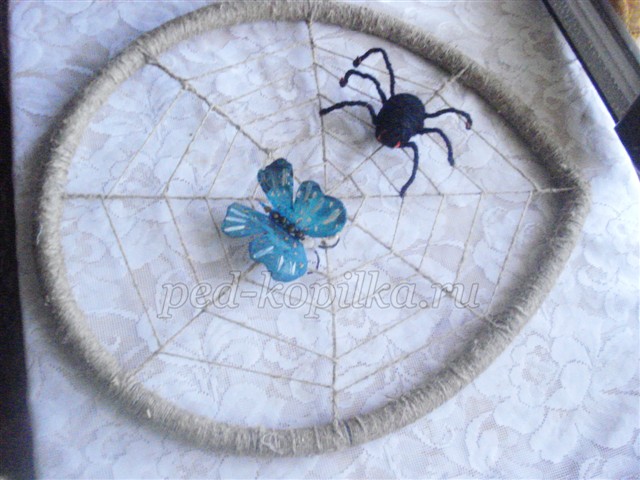
You can use our crafts and so:


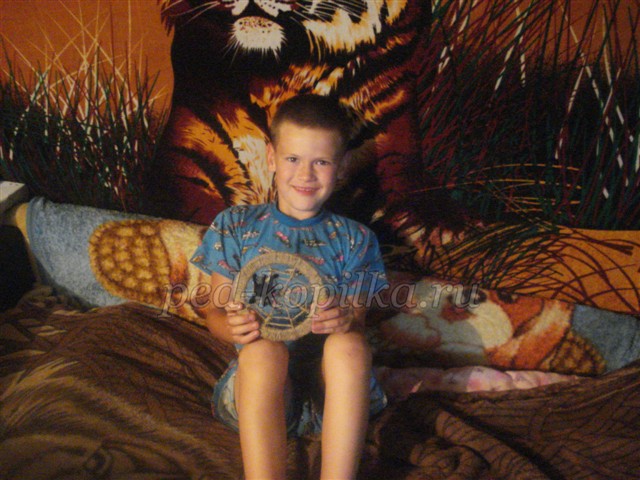
The craft was made by a child of 7 years old.
As for me, the best natural materials for making DIY do not happen. Nature itself gives us bright, unusual material for our creativity. You can supply yourself with the necessary equipment all year round: shells in the summer, cones in the cold. And in the fall, fireworks of paints from falling leaves, acorns, chestnuts and many other interesting and beautiful.
Walking through the autumn park, filling the chest with fresh air and burning extra calories in an easy game with children, you can collect material for crafts. What to do? Ideas can also be drawn from nature. Surely in the park you met intricate patterns of cobwebs. Who is stopping us from weaving our own pattern? To the cause!
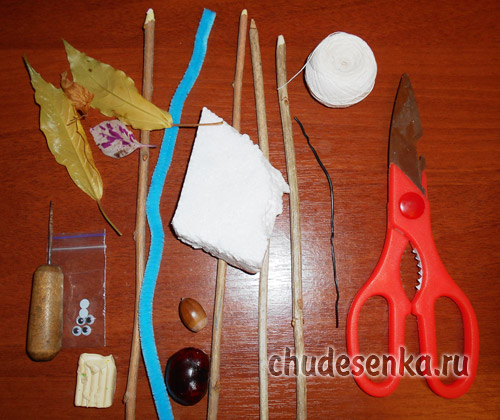
Necessary tools and materials:
Twigs;
- chestnut;
- an acorn;
- leaflets;
- Styrofoam;
- a thread white color;
- scissors;
- glue;
- wire with a black winding;
- chenille fluffy sticks (wire);
- awl;
- white plasticine;
- artificial eyes.
Craft spiders on a web of natural material
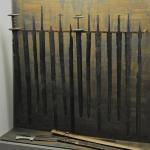
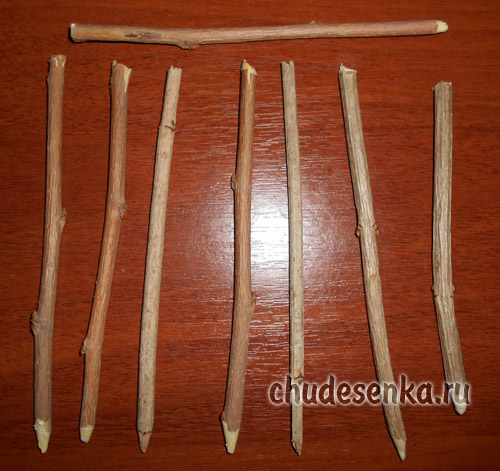
Twigs we need are not very thick, about 0.5-0.6 mm in diameter. Cut 8 sticks 11-12 cm long. On one side we sharpen the tip so that it is sharp. This can be done with a knife or use a pencil sharpener.
We take a piece of polystyrene about 1 cm high (less is not recommended, otherwise the branches will not fit well into it). Cut a circle with a diameter of about 4 cm. We begin to insert the sharp end of the branch into it. First, make a hole with scissors. For reliability, the tip of the twig is greased with glue and inserted. First 4 branches in opposite directions in a horizontal and vertical line.

Then we insert 4 more branches between horizontal and vertical "cobwebs". 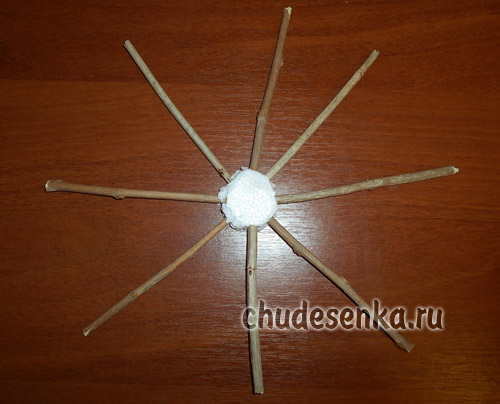
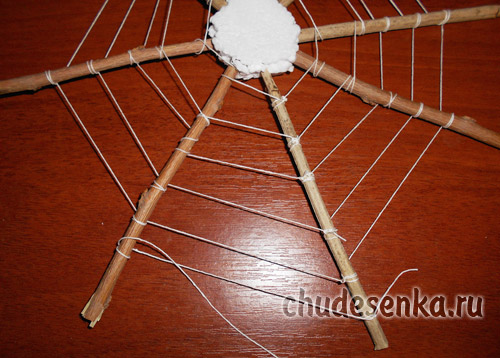
Let the glue dry. We take a white cotton thread, tie its tip to one branch, pull the thread to the next branch and wrap it with thread twice (if you make one turn, the thread will then shift), pull again to the next branch and again wrap it with thread. We do this with all the branches. When we return to the stick with which we started, cut the thread and tie the tip (do knots on one side, it will be back).
In the same way we do the 2nd, 3rd and so on row. The result should be a web. 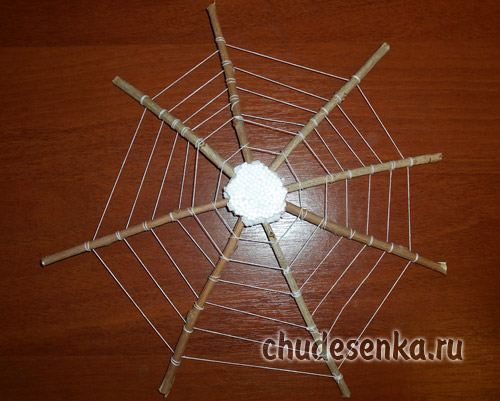
Take the chenille wire. Better if she will be black or brown color. If there isn’t one available (as it turned out for me), then we take any color, we will have a modern spider that is not afraid of experimenting with its image. Cut 6 pieces 4 cm long.

With an awl or a gypsy needle, we make a hole in the chestnut and insert a chenille stick into it. Then we bend these pieces, like the legs of spiders.

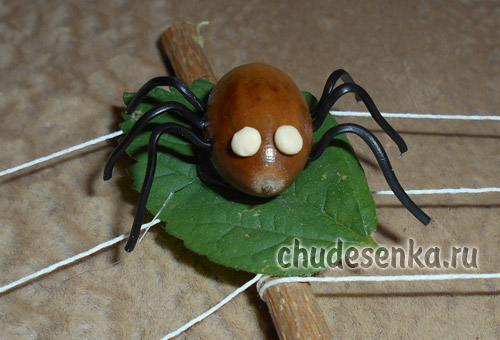
The second spider will be made from the acorn. The material for the legs will be the wire in the black winding (the cord with the plug is often fastened with such a plug in the new technique, you just don’t need to throw them away, if it wasn’t this color, you can use any one or wrap the wire with black thread). Cut 6 pieces of 3 cm long from the wire. We also make holes with an awl and insert the legs.
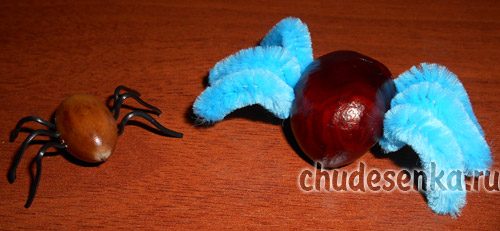
Chestnut spider glue artificial eyes, and little spider we make them from plasticine, rolling it into small balls. 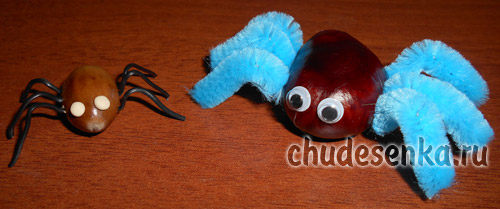
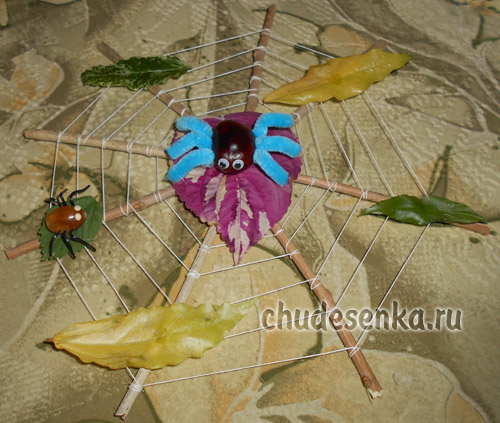
Glue the leaves. 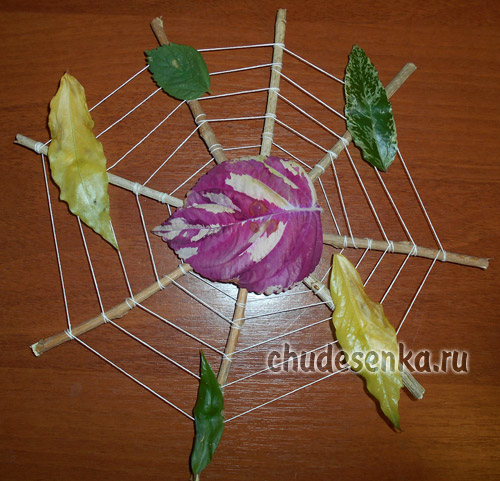
Glue our spiders, one in the middle, and the second anywhere. 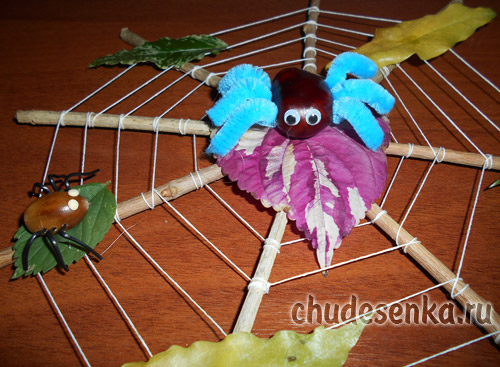
Craft made from natural materials is ready! Enjoy your walks, successful collection of natural material and creative success!